Camera
On this page
Hardware: LUMIX Panasonic DMC-G3, camera mount platform
Software: FastStone Image Viewer 7.6
Introduction
This procedure, though titled “Digitizing 3-D Items” might be better described as photographing 3-D items. The advice in this section will outline considerations for photographing or videoing 3-D items in the Digitization Lab as well as how to convert .raw files into a readable format.
Physical Setup
Camera
- The camera is located underneath the cart next to the oversized scanner.
- Grab the battery for the camera found on the charger next to the Bookeye overhead scanner (see below, boxed in red).
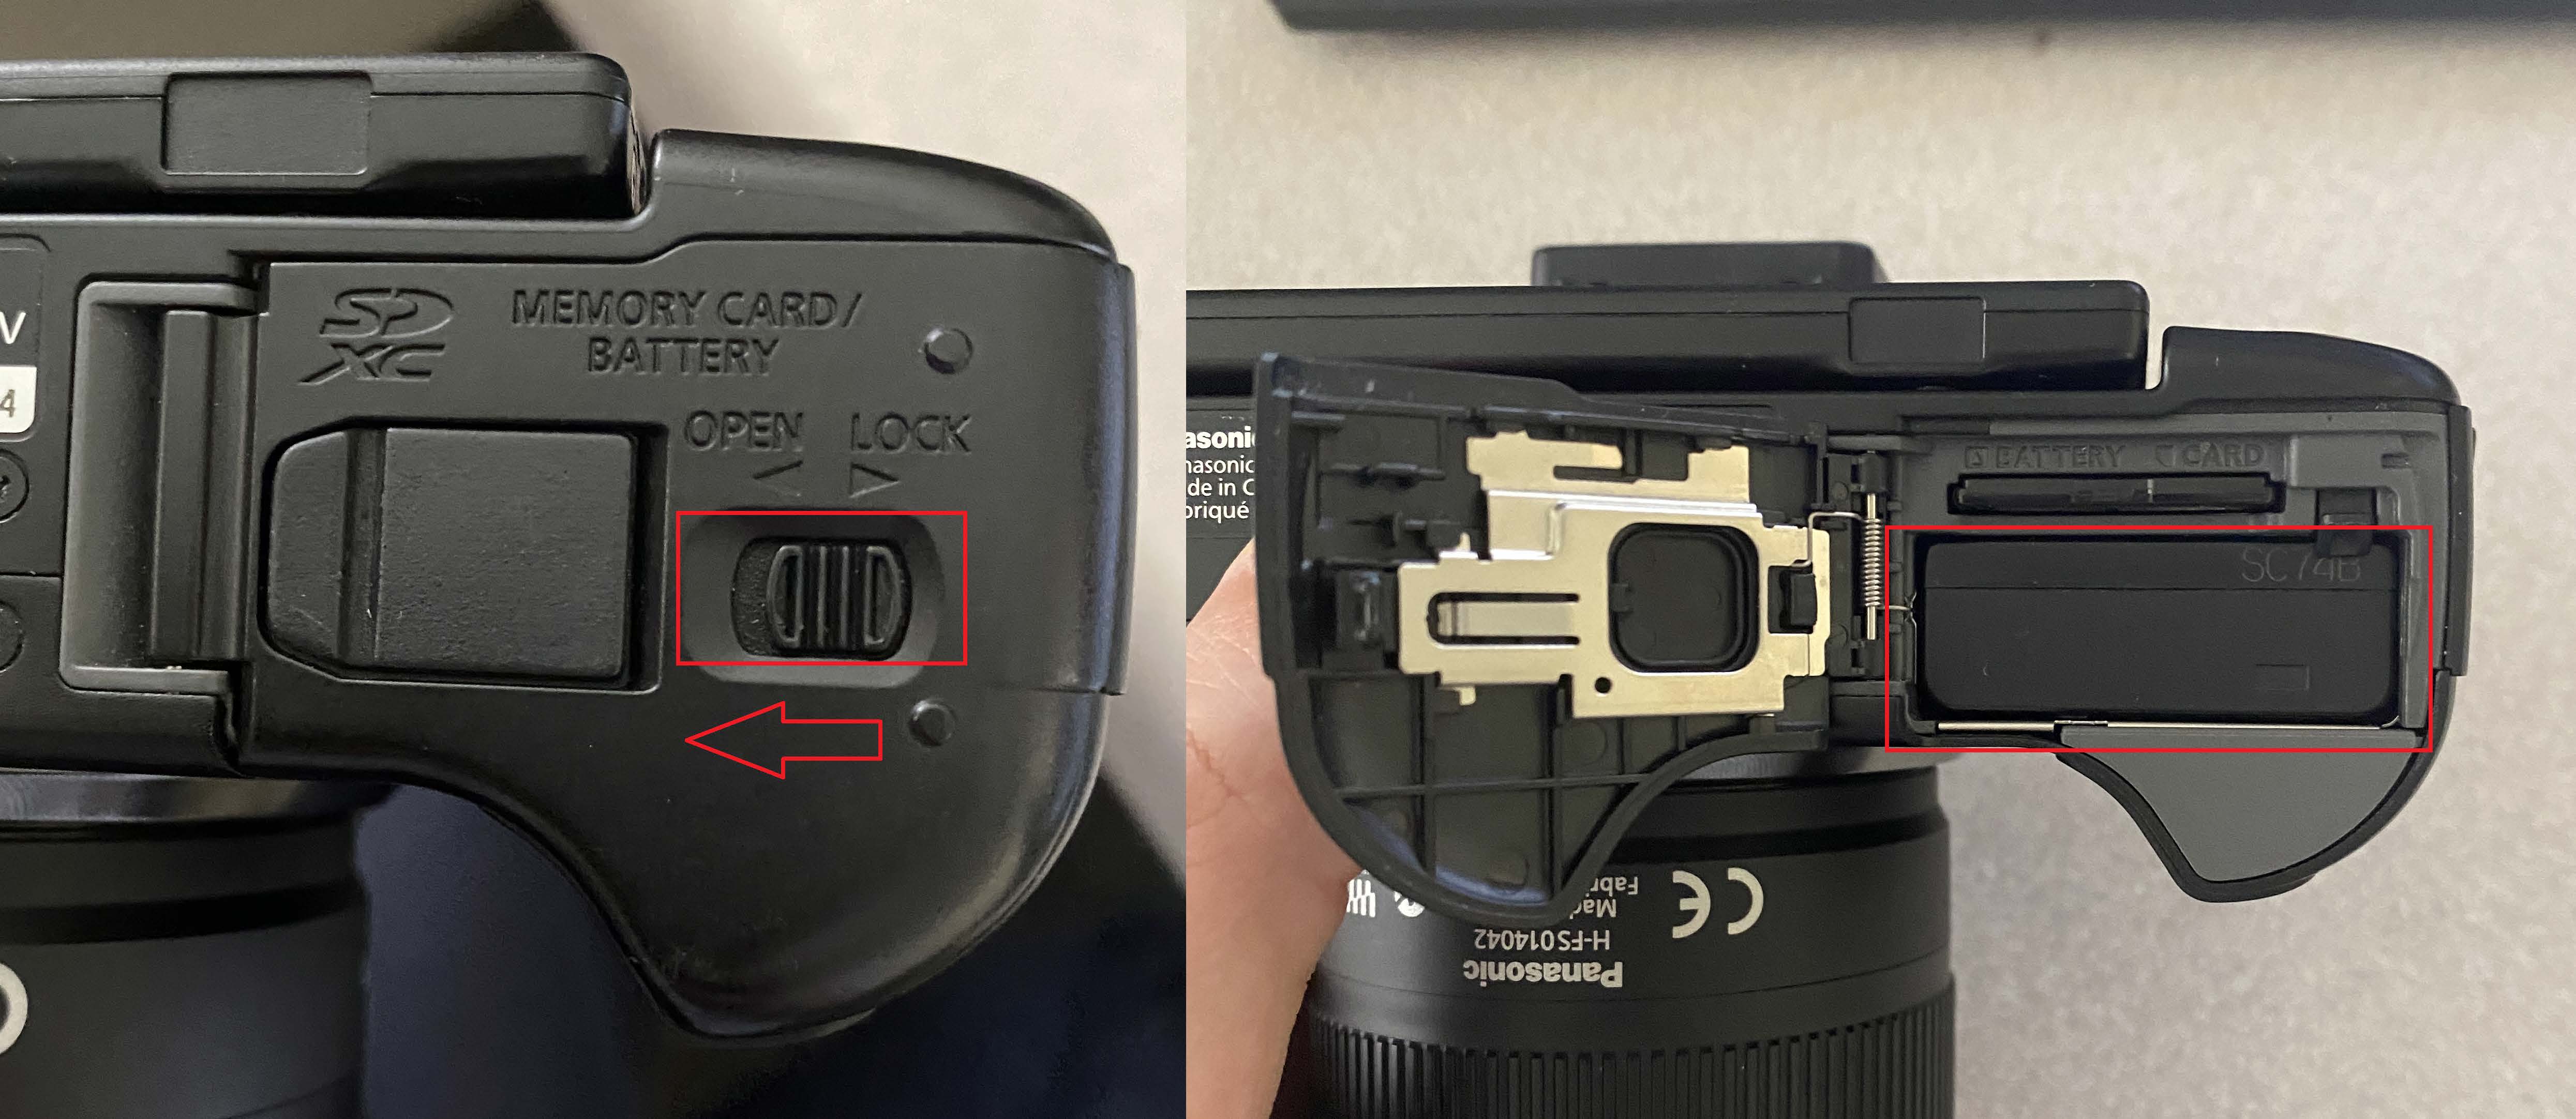
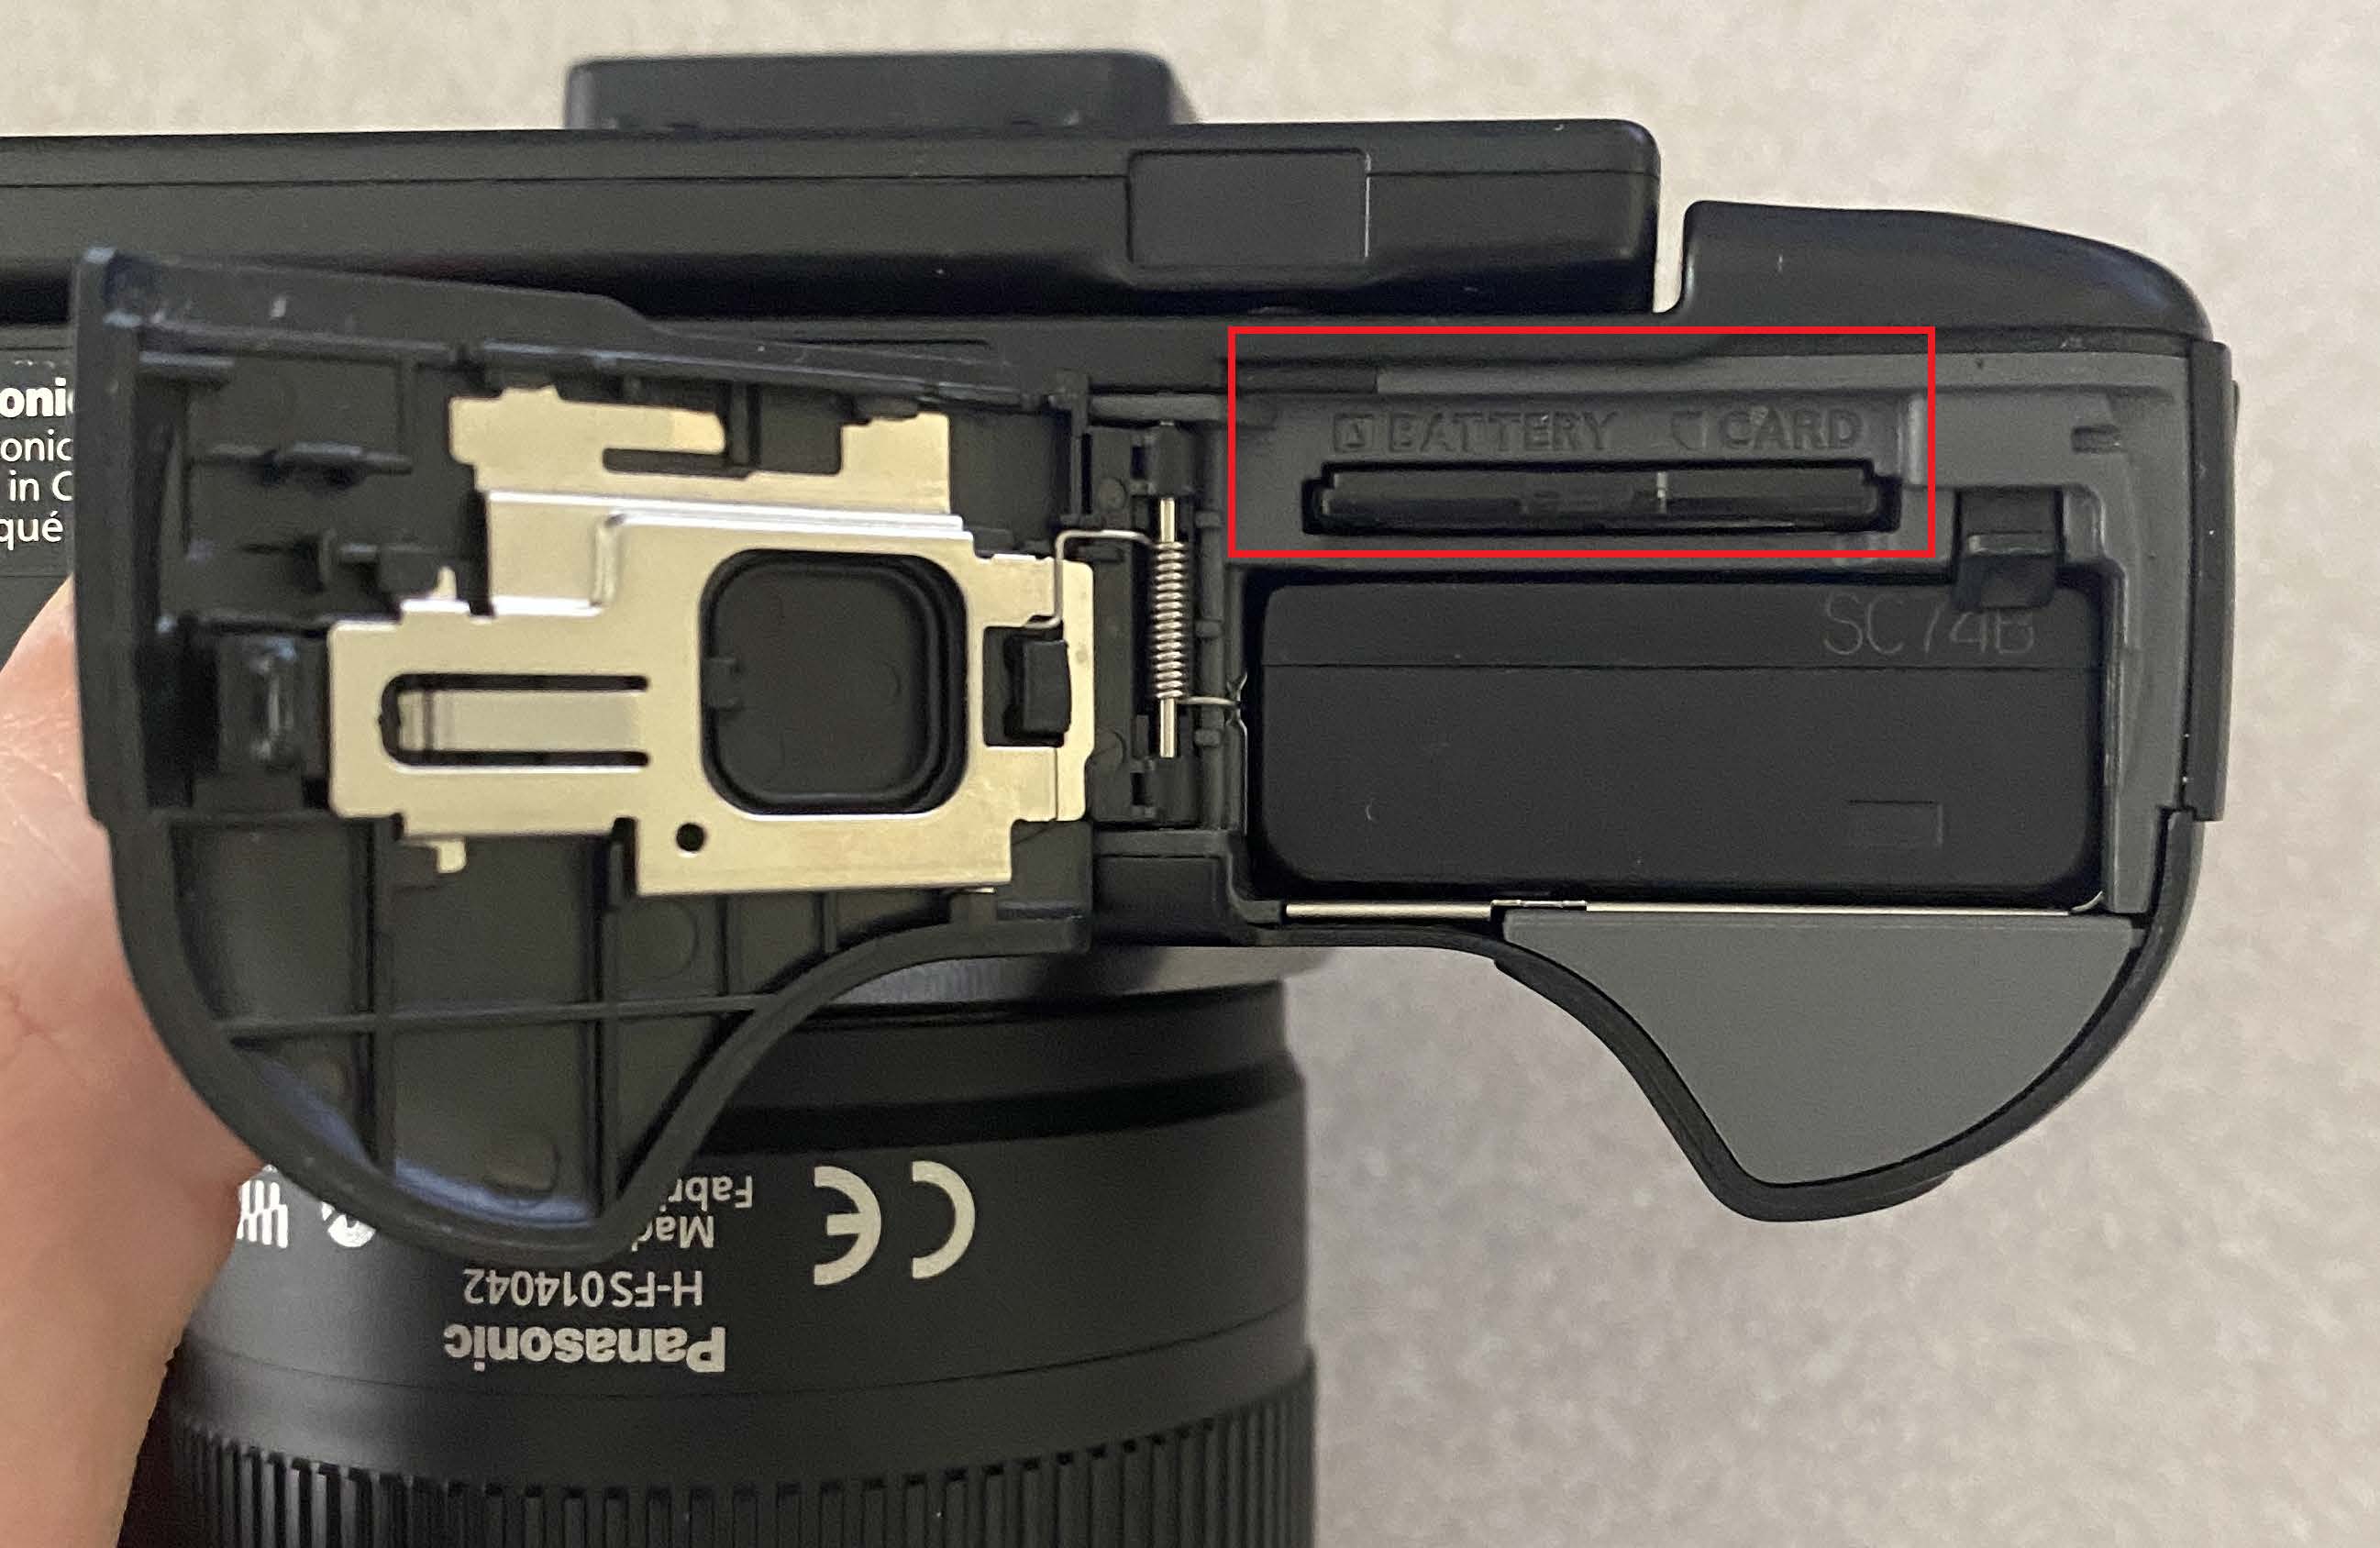
- Put the battery in the camera. You can do so by opening the compartment on the bottom of the camera by pushing the Open/Lock slider to the left in the first image. The second image shows the slot where the battery goes.
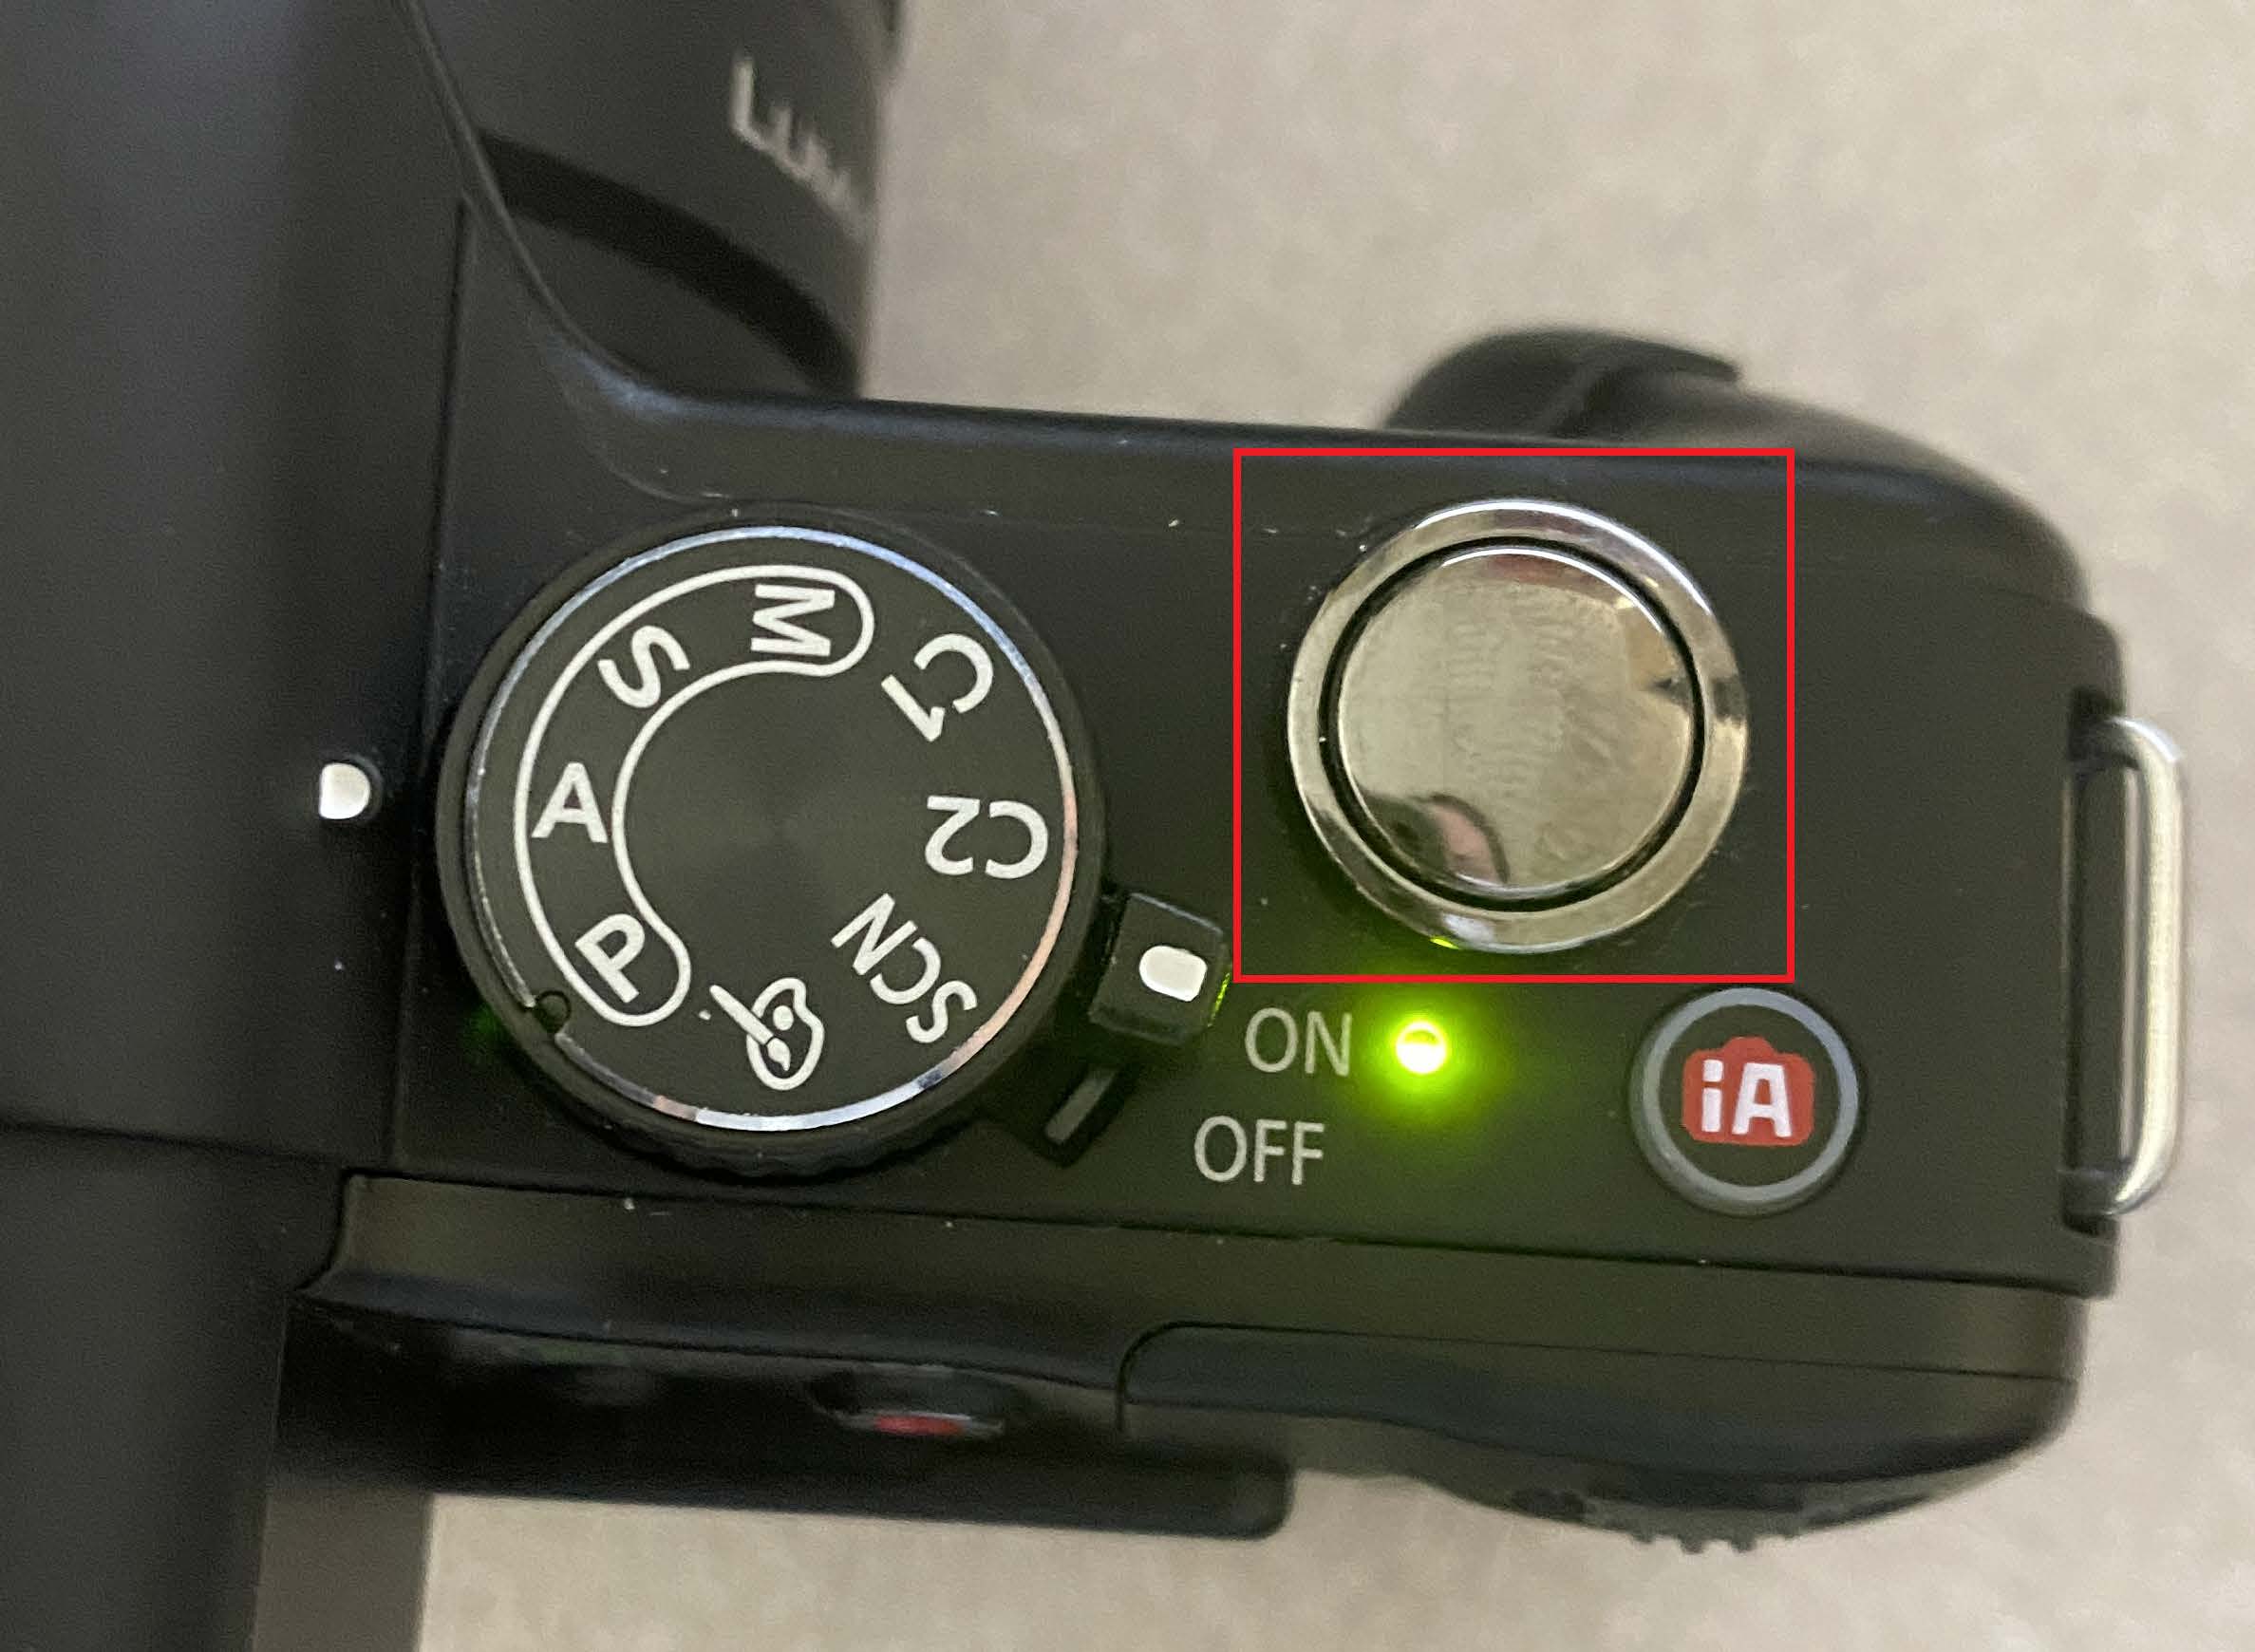
- Turn on the camera by flipping the switch (seen below) on top of the camera forward. The green light will illuminate to represent that the camera is on.

- Remove the lens cap from the camera.
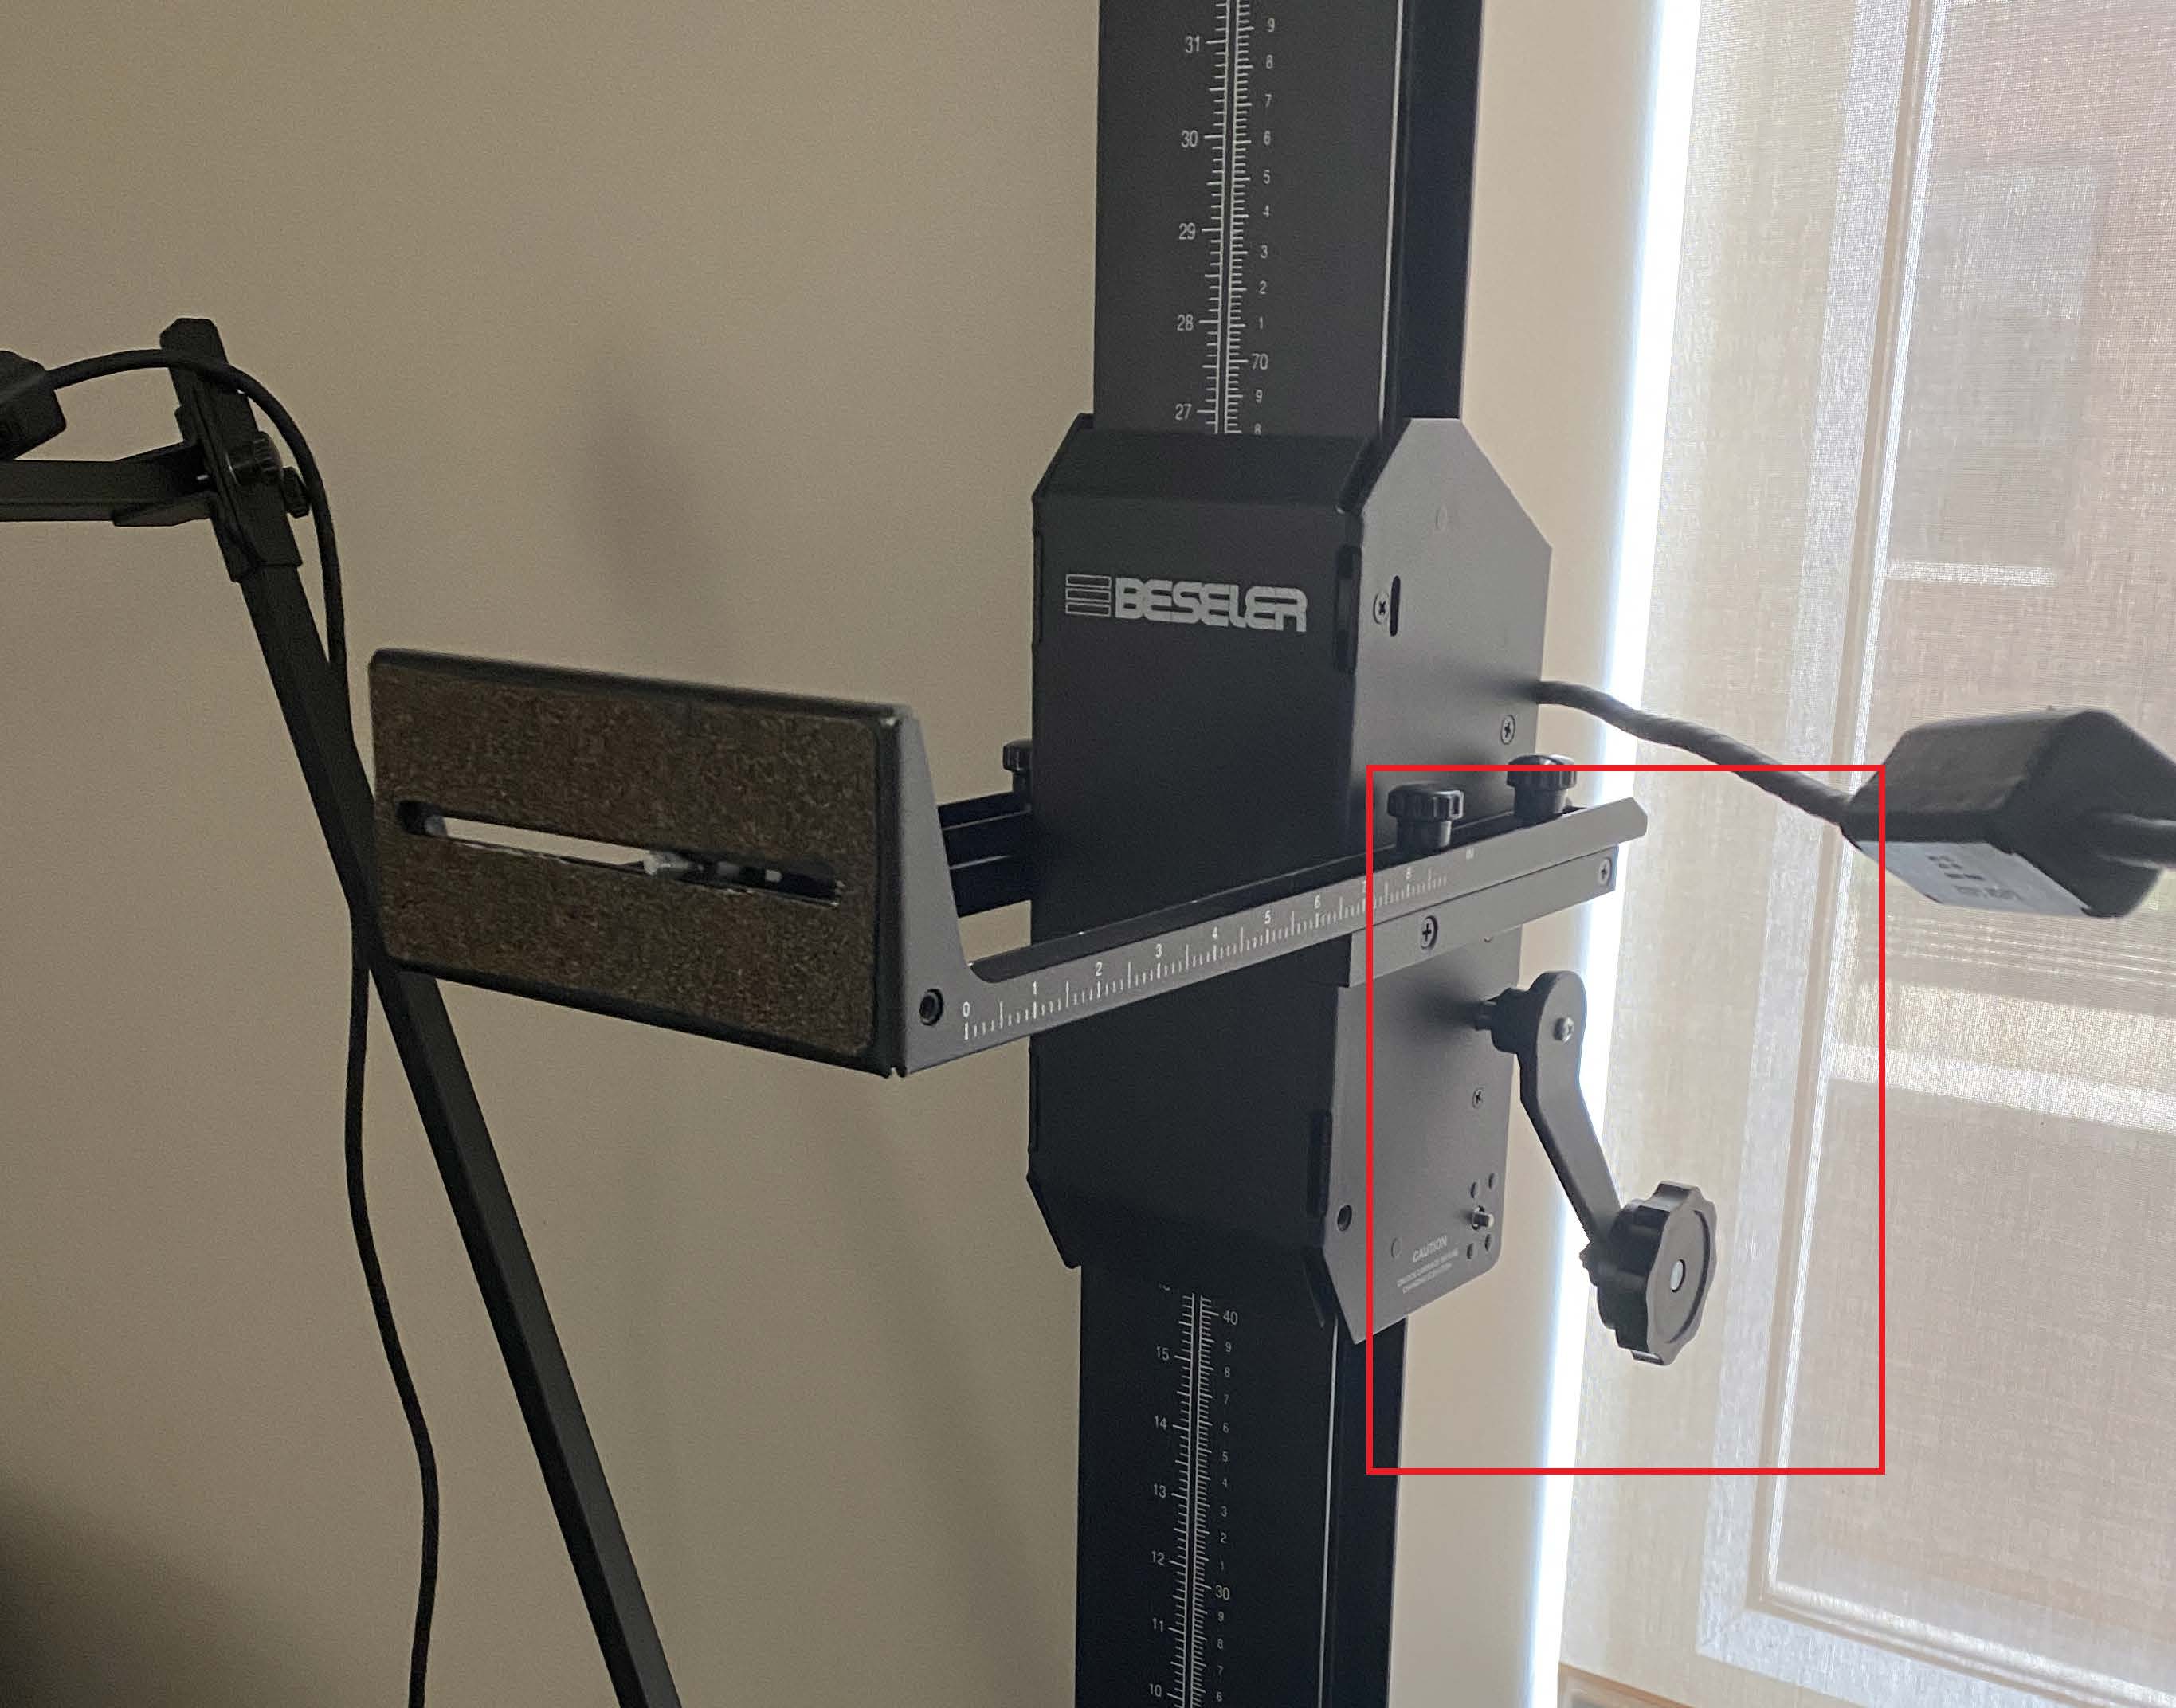
Camera Mount
The camera mount (seen below) is helpful if you want to take consistent photographs of many objects or of books.

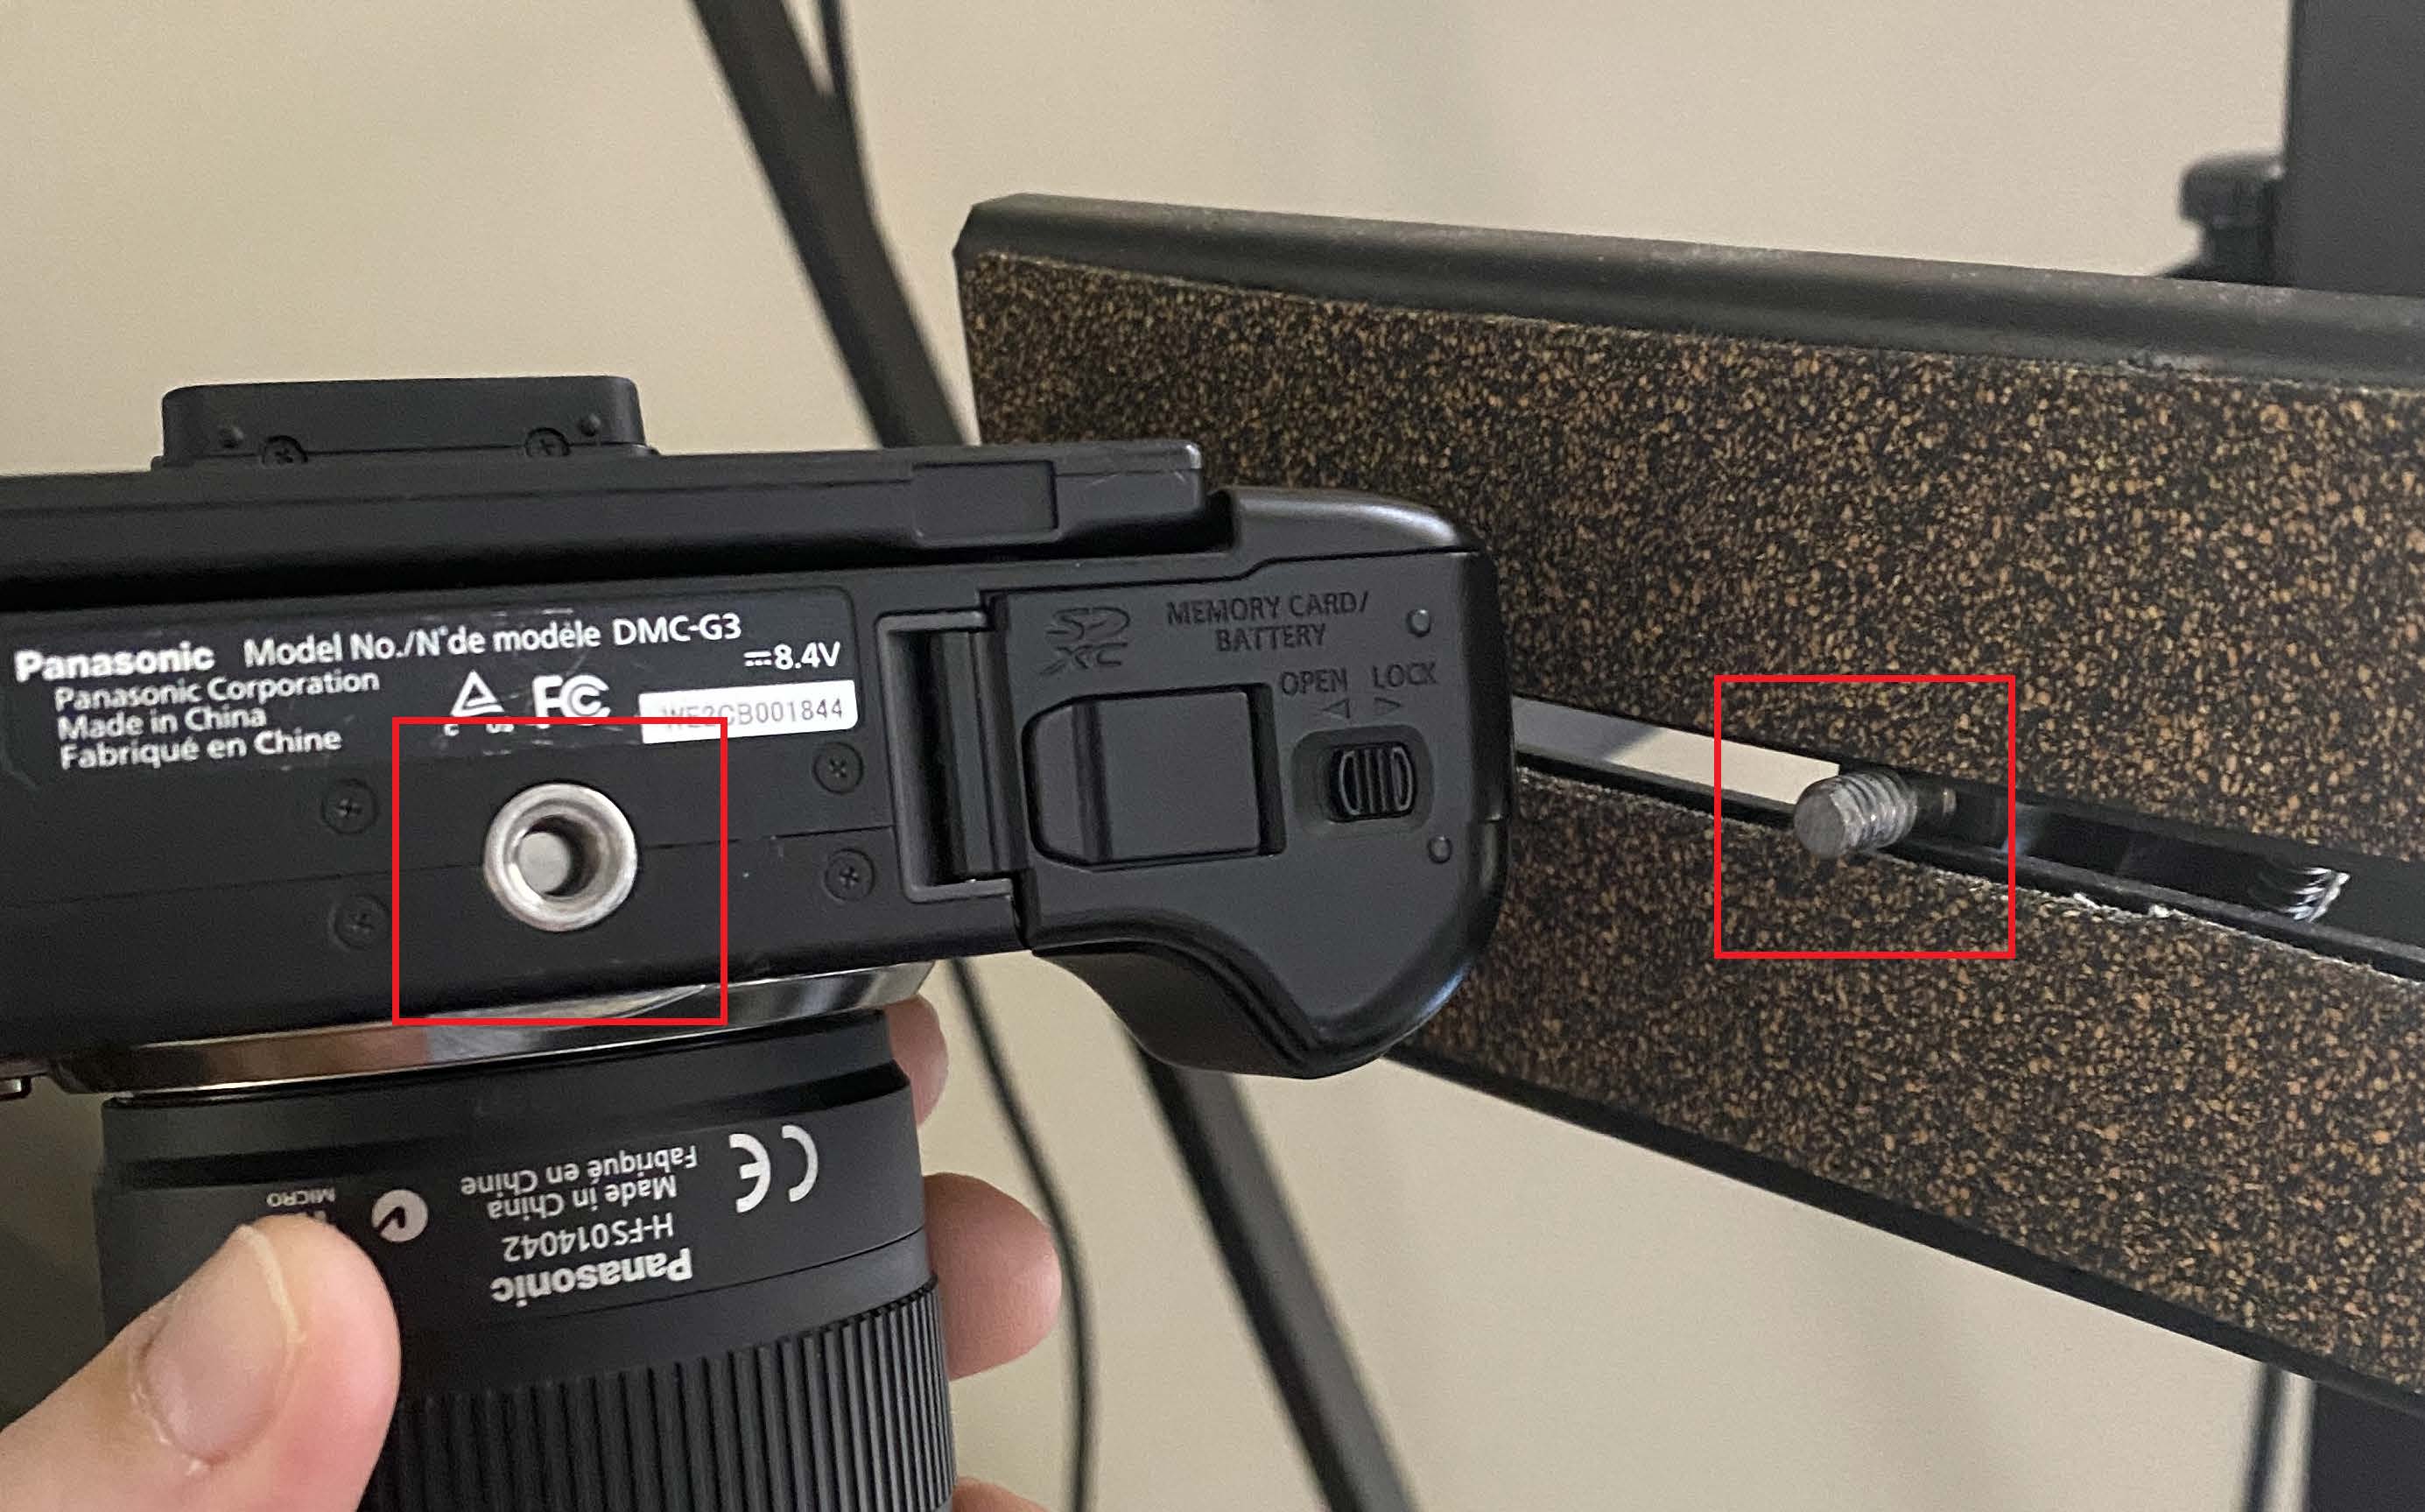
You can use the camera stand by screwing the bottom of the camera (boxed in red below on the left) to the camera stand (boxed in red below on the right).
Raise or lower the height of the camera mount itself using the crank (boxed in red below) on the side of the camera mount.
The camera viewscreen can flip outwards for easier viewing. You can proceed to take photos as outlined in the Taking Photo or Video section.
If you would like a background other than the gridded base, there is a large pad of paper behind the camera mount. You can use the pad of paper as a white background for your photographs.
Lighting
There are several options for setting up your capture area lighting that you might want to consider. These will vary based on the project you’re doing.
- To modify the lighting in the room to be brighter, turn on the lights attached to the camera mount. If either of the lights bulbs are out, contact digitizationlab@mail.wvu.edu.
- Alternatively, open the blinds and use natural light as a supplement to existing light.
- If using natural light, consider moving the camera mount platform to other portions of the room. Be sure to verify that the lights on the stand are not plugged in.
Take a test photograph and view the photograph on the screen.
Look at the output photograph to determine if you are satisfied with the lighting. If not, try another of the above solutions.
Selecting the Settings
There are a significant number of optional settings for photography that may be of use and are too numerous to outline here. To see what options are available and how to set the settings, check the camera manual.
Taking the Photo or Video
If you would like a background other than the background available in the lab, there is a large pad of paper behind the camera mount. You can use the pad of paper as a white background for your photographs or video.
Photo
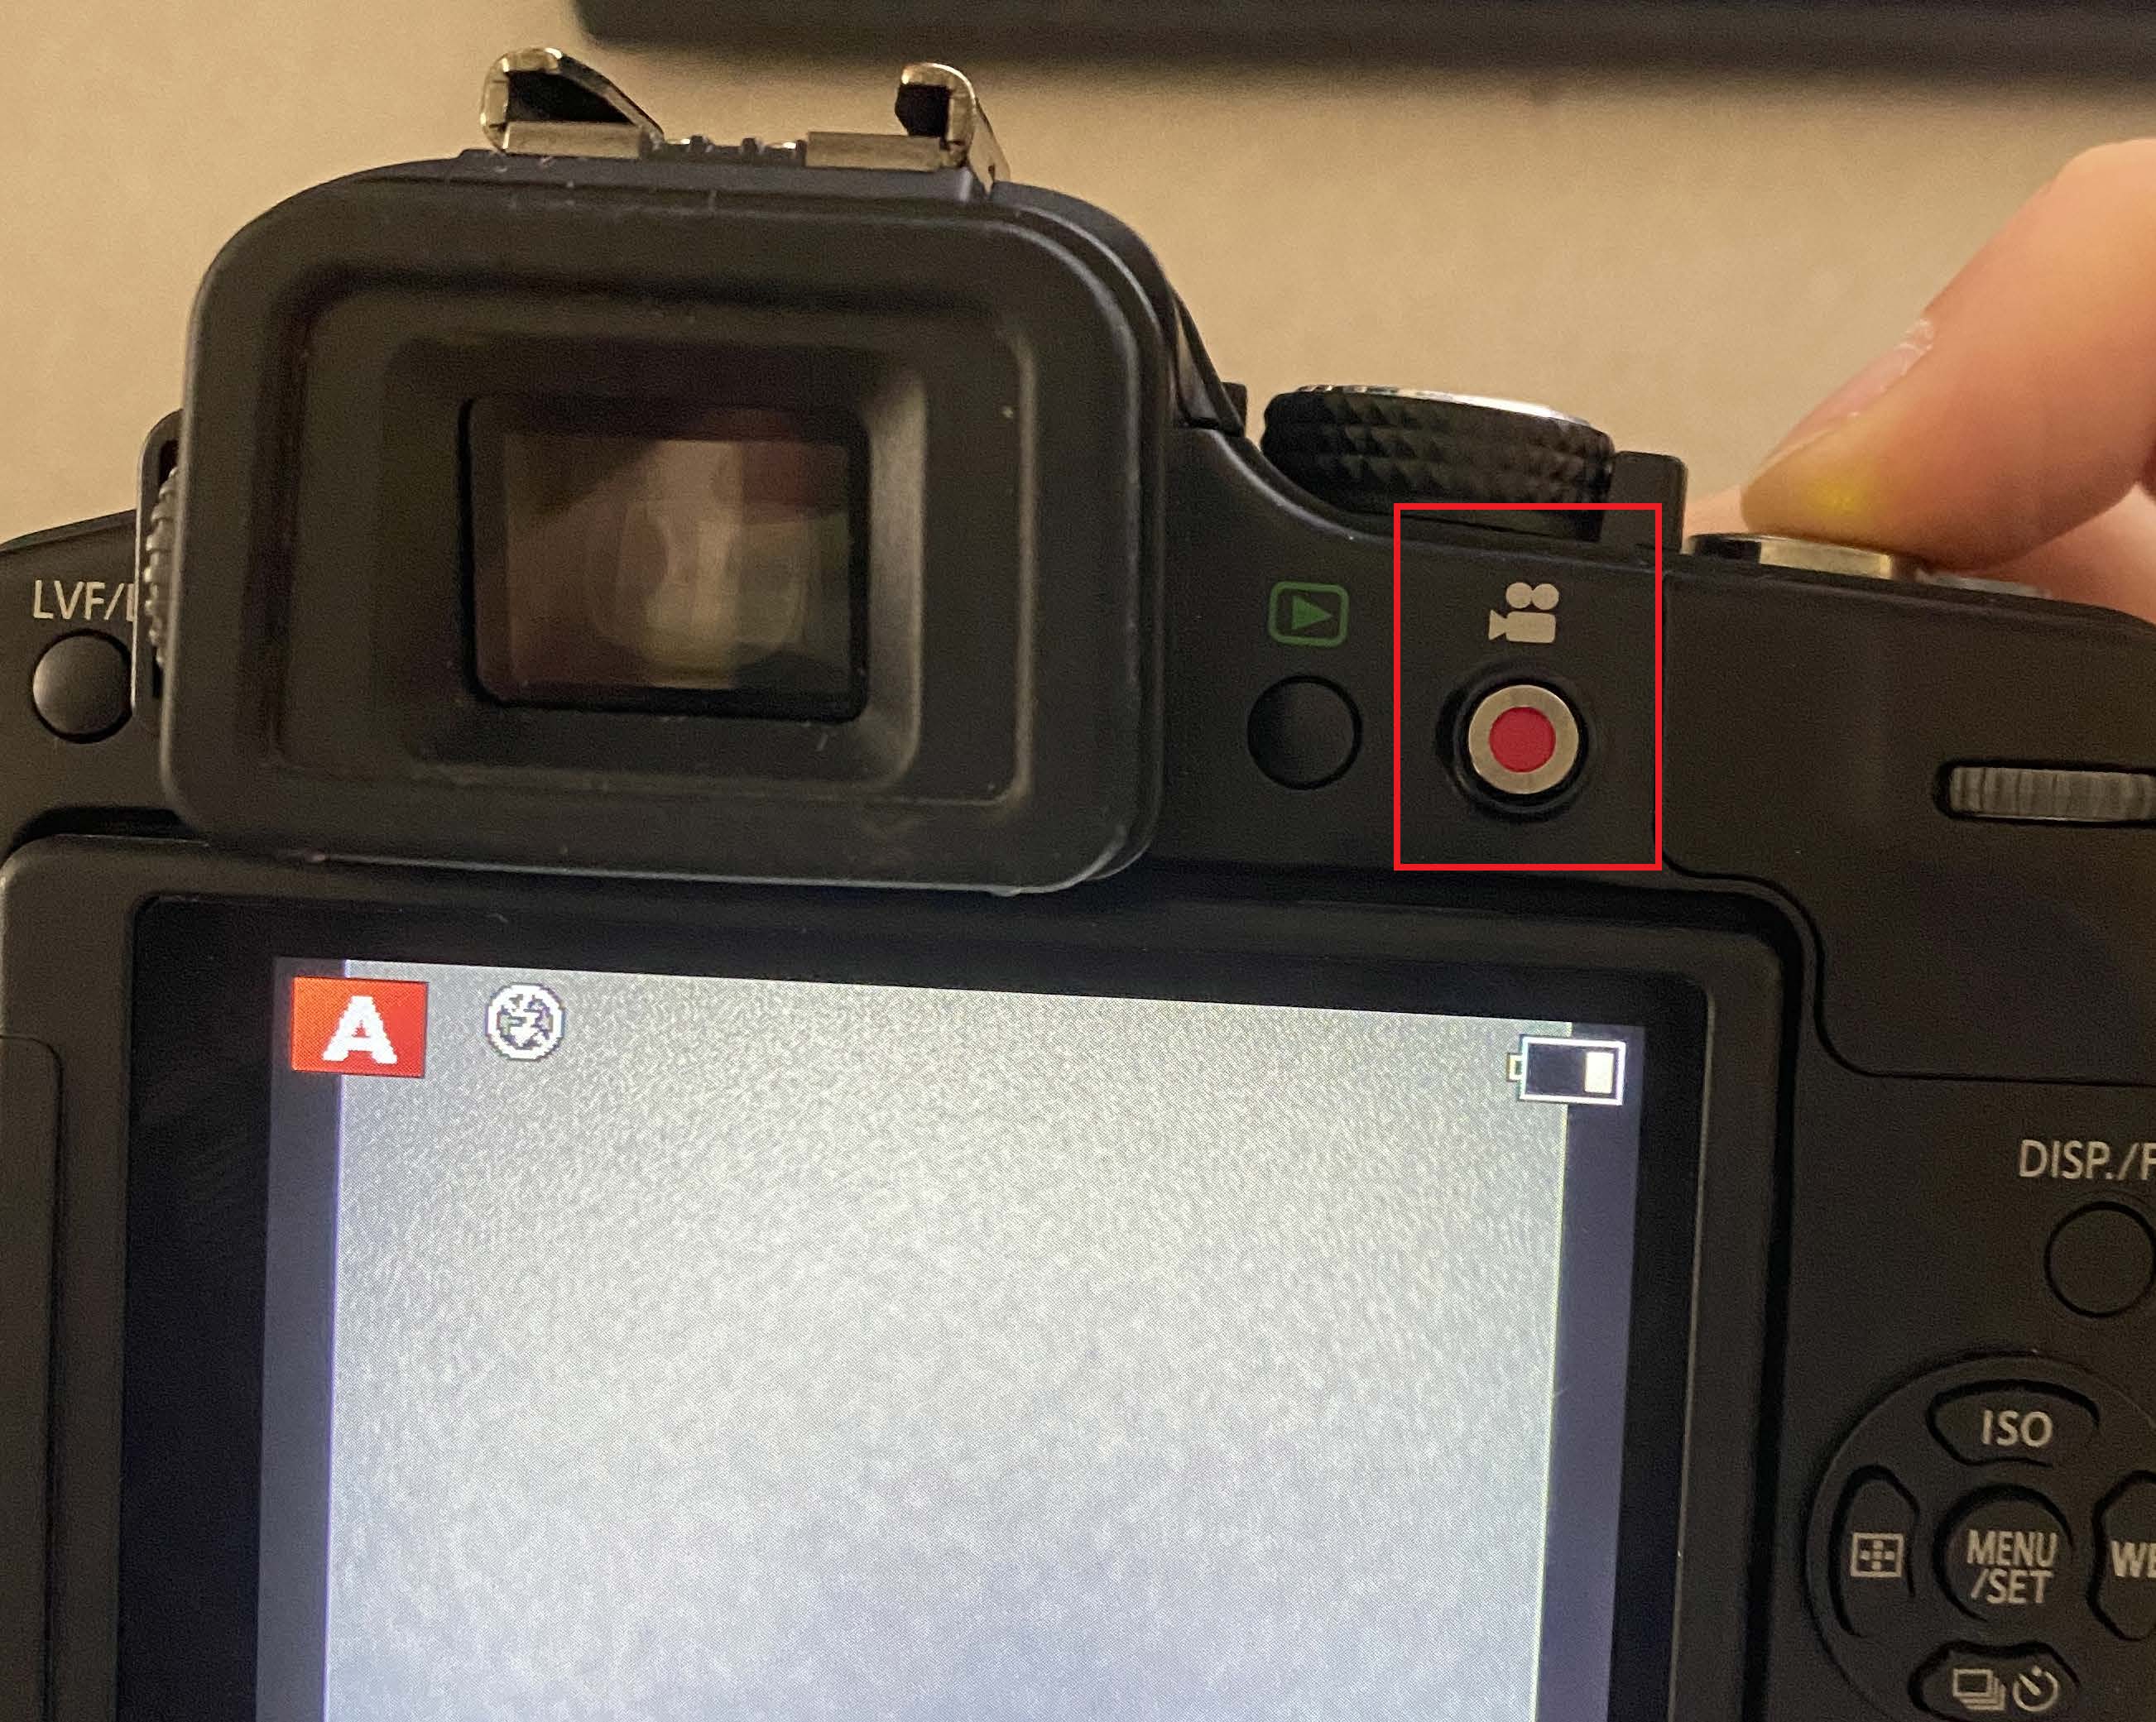
- Lightly press the silver button on top of the camera to focus; fully press the button to take a photo.
Video
- Press the record button to start and stop the recording. Lightly pressing the silver button on top of the camera takes a picture while recording is occurring.
Export and Convert the Photos
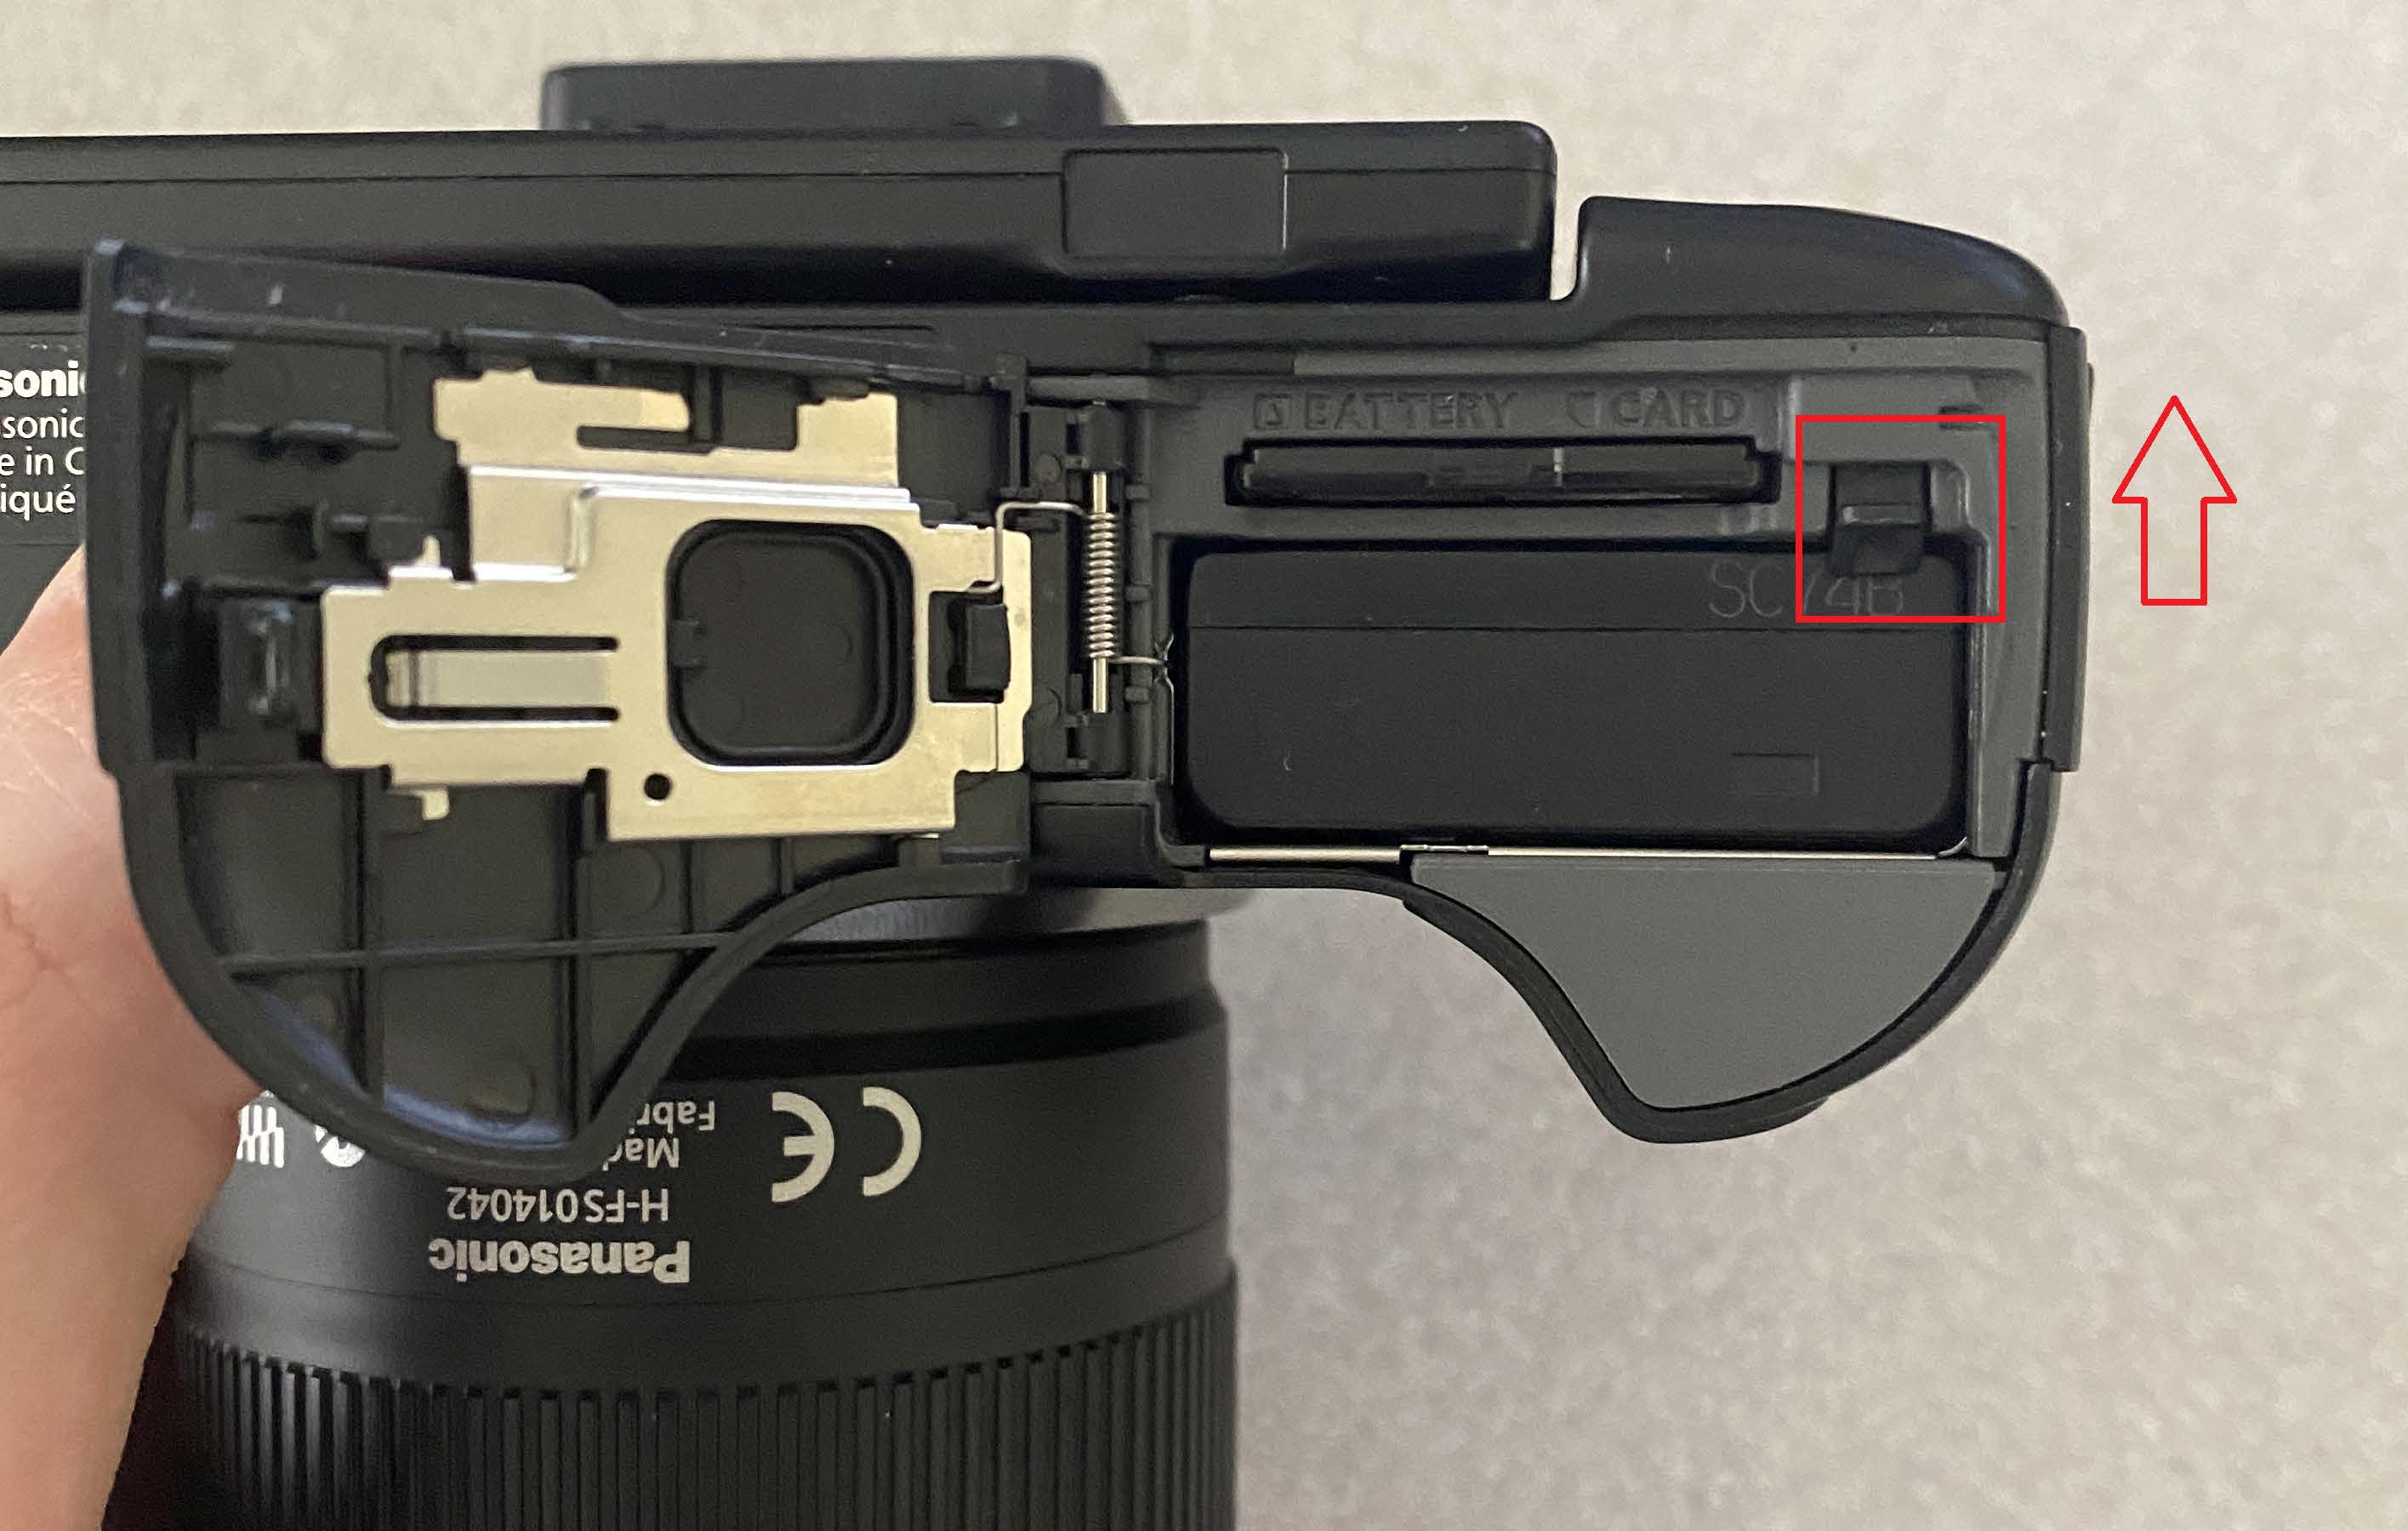
- Remove the memory card from the camera. The memory card can be removed by opening the bottom compartment (using the instructions in step 3 of Physical Setup: Camera) and pressing down on the card (boxed in red below) and releasing.
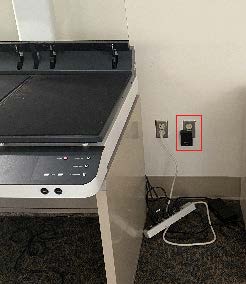
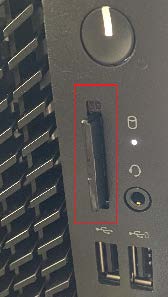
- Insert the memory card into the 2-D and 3-D Digitization Station computer. The image below shows the memory card in the front of the computer (boxed in red).
- Navigate to File Explorer → This PC on the computer. You can view the contents of the memory card by clicking the following drive location (boxed in red).

- To view photos, including photos taken during videos, go to D:\DCIM
- To view videos, go to D:\PRIVATE\AVCHD\BDMV\STREAM.
- If you wish to save your photos as-is, you can do so from here. If you want to convert from the .rw2 file format to a more usable format such as .tif or .jpg, you can do so by using FastStone Image Viewer, located on the desktop, and following the subsequent instructions below.
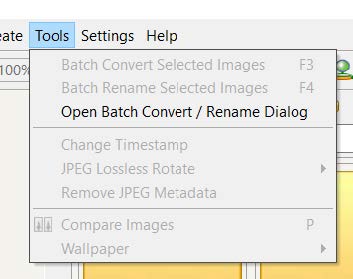
- Open FastStone Image Viewer from the desktop. Click Tools → Open Batch Convert / Rename Dialog.
- Navigate to the folder containing the photos you would like to convert using the … button next to the file path bar.

- Select the photos you want to convert by clicking them on the left file list view. Click Add (boxed in red below) to move them to the list of files to be converted on the right.

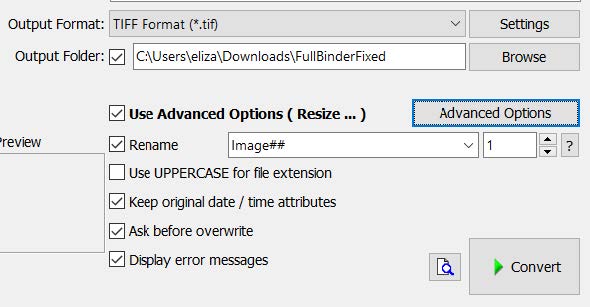
- Select the output format by pressing Settings and select the output folder by pressing Browse seen in the screenshot below. Advanced Options allows you to configure other batch actions such as batch rotating photos and more. Press Convert once you have selected all of your settings.
- If you are uploading the output files to a cloud location, such as OneDrive, upload to the cloud location of your choice. Once you have verified the file is uploaded, be sure to delete the file from the output folder. Delete your images and/or video from the memory card.
- Place the memory card back in the camera and place the battery back on the battery charger. The battery can be removed by pushing the tiny plastic piece holding the battery in up.