Cassette Player
On this page
Hardware: TEAC Double Auto Reverse Cassette Deck W-890R MK II, Roland Octa-Capture
Software: Audacity
Identification and Introduction
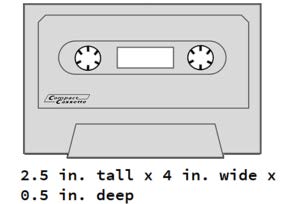
Audio cassettes were a magnetic tape-based recorded sound format composed of magnetic particles or pigment, binder, and a polyester base and were popularly used from the 1970s through the 1990s. The lifespan of a cassette is dependent upon numerous factors: the quality of the original tape, the type and condition of the machine on which it is played, the amount of care the tapes are given, how often they are played, and how they are packaged. Frequent playback wears on the media and degrades the sound quality with each playback. The projected lifespan of cassette tapes is 10 to 30 years. To learn more about cassette tapes, see the University of Illinois at Urbana-Champaign’s documentation on the format.
Digitization Procedures
Inspect Item for Issues
Because of the age and fragility of the format, it is important to inspect the item for preservation issues before digitizing the item. Follow the checklist below to determine whether there are any issues with the tape that might impact digitization.
- Examine the cassette for biological contamination. This might include:
- Mold- Examine the inside of the cassette case and the edges of the tape. Mold can be black, brown, or mustard-colored, and has fuzziness and hair-like growths. If you encounter mold, do not digitize these materials as moldy tapes, when played, can contaminate all other subsequent tapes played. Place the effected media in a plastic bag to quarantine it and reach out to digitizationlab@mail.wvu.edu to determine next steps.
- Pests- Look for droppings, urine stains, tracks, and gnawing damage. If you encounter evidence of pests, place the effected media in a plastic bag to quarantine it and reach out to digitizationlab@mail.wvu.edu to determine next steps.
- Examine the cassette for chemical degradation.
- Smell the open portion of the cassette case for any odors. Do not breathe in deeply, but instead waft the smell towards your nose by making quick fanning gestures with your hand. If the tape has a waxy, dirty socks, or pungent odor, chemical breakdown has likely occurred. Be sure to monitor these tapes closely while conducting digitization and reach out to digitizationlab@mail.wvu.edu once digitization is complete or any issues are encountered so that the tape heads may be cleaned.
- Examine the cassette for physical damage.
- Tape reel is flaky or there are tape particles inside cassette case
- Audio content is encoded on a magnetic tape layer sitting on top of the base tape layer, meaning that any flaking of the top layer results in a loss of content or quality. Be sure to monitor these tapes closely while conducting digitization and reach out to digitizationlab@mail.wvu.edu once digitization is complete or any issues are encountered so that the tape heads may be cleaned.
- Cassette tape is damaged
- Damage may include a cracked shell, cracked or missing cassette window, and a detached, off center, loose, or missing pressure pad (seen below, view from bottom of cassette tape)
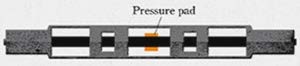
- All of the above factors may result in a loss of content or tape quality unless the cassette tape case or pressure pad are replaced. The Digitization Lab does not have supplies immediately available to fix this issue, however, please reach out to digitizationlab@mail.wvu.edu so that the Lab can source materials and create procedures for this work in the future. If you choose to move forward with digitization, be sure to monitor these tapes closely while conducting digitization.
- Tape reel is flaky or there are tape particles inside cassette case
- Reel of tape inside casing is broken, torn, or wound inconsistently or incorrectly
- Incorrect or inconsistently wound tape can be corrected by manually rewinding tape.
- The Digitization Lab does not have supplies available to splice broken audio tape in a way that follows the preservation principles of reversibility and not doing harm to materials in the long-term. Certain methods of splicing tape, such as using standard office tape, are not recommended. These splices can create adhesive residue in the tape player itself causing mechanical damage to the player. Additionally, these splices can damage the tape itself. Please reach out to digitizationlab@mail.wvu.edu so that the Lab can source materials and create procedures for this work in the future.
Physical Setup
- Verify that the Roland sound interface and cassette player are plugged in to the surge protector below the desk. The cords are labeled as Roland sound interface and cassette player respectively. Turn on the devices by pressing and briefly holding the power button on the upper right of the Roland sound interface. Turn on the cassette player by pressing the power button in the lower left—the power button should stay pressed once you let go.
- Plug the red and white tipped cords for the cassette player, found hanging on the cubicle wall and labeled with Cassette Player, into the Roland sound interface (see image below).

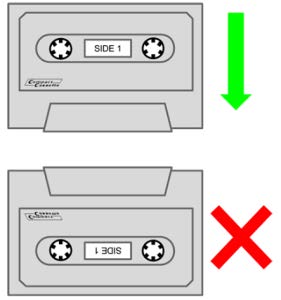
- Before inserting the tape into the player, look at your tape to determine if it needs to be rewound. You will know you need to rewind the tape if, with Side A or Side 1 of the tape facing you, there is brown or black opaque, non-transparent tape on the right reel inside the cassette tape. All tape needs to be on the left reel so that you may start from the beginning without missing audio. You can rewind your tape by following the instructions in step 4.
- Press Eject.
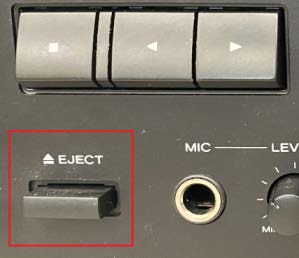
Once pressed, the tape deck will open. Insert the cassette tape with the open, magnetic tape side down. To start on Side 1 or Side A, insert the tape with Side 1 or Side A facing you.
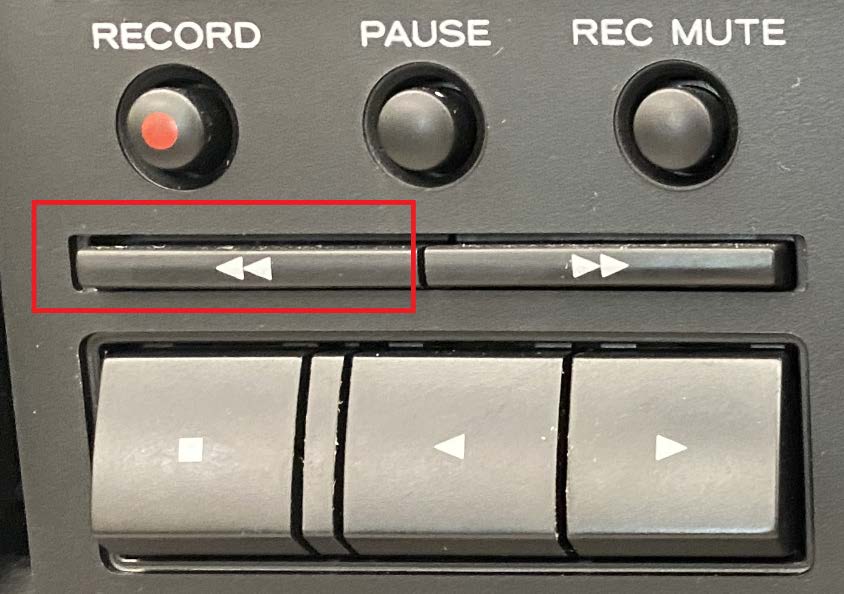
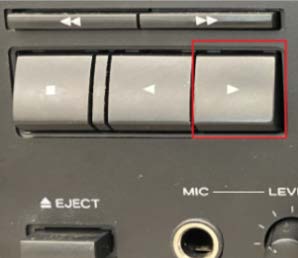
- Once the tape is in, if you determined in step 3 that your tape needs to be rewound, press the rewind button on the cassette player, shown boxed in red below. Note: DO NOT PRESS RECORD BY ACCIDENT. This will record over your tape. The cassette deck will stop automatically once complete. While the tape is rewinding you can move on to the next section.
Selecting the Settings
- The settings chosen for digitization are based on whether digitization will be conducted at preservation or access quality. Preservation quality files are chosen when conducting digitization of materials for long-term retention and preservation and should be chosen when working with unique archival materials. The settings can be found under “Cassettes” in the Digitization Standards Document and summarized here:
| Preservation Settings | Access Settings | |
|---|---|---|
| File Type | .WAV | .MP3 |
| Encoding | LPCM (Linear Pulse Code Modulation) | LPCM (Linear Pulse Code Modulation) |
| Sampling Frequency | 96 kHz | 48 kHz |
| Bit Depth/Rate | 24-bit | 24-bit |
| Audio Channel | Stereo | Stereo |
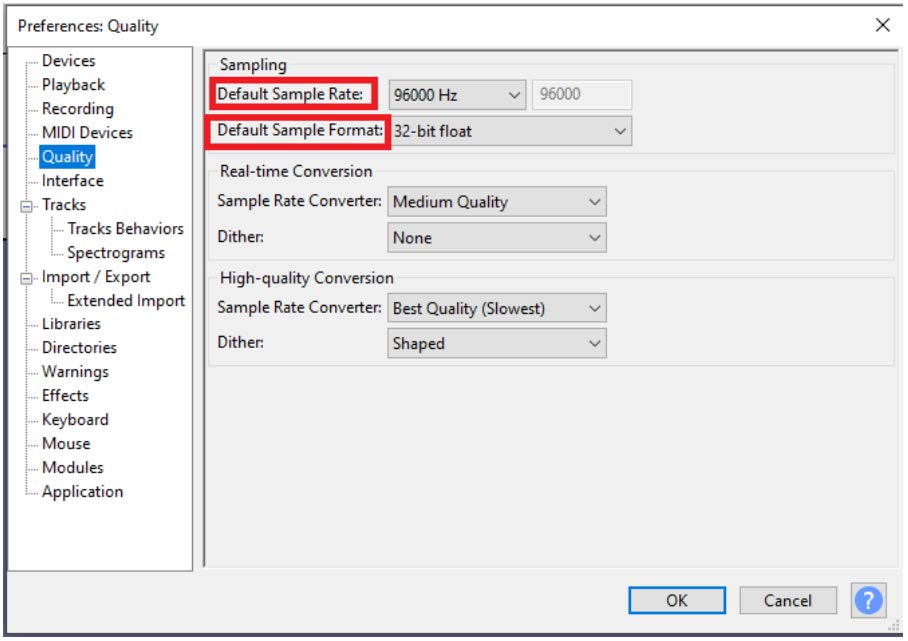
- With the settings you have identified in mind, open Audacity by clicking the shortcut on the desktop. Select the button for Edit on the toolbar, then select Preferences. Click Quality on the left toolbar of the Preferences settings box (see below) that appears. Use the dropdowns for Default Sample Rate (aka Sampling Frequency) and Default Sample Format (aka Bit Depth/Rate) to select the relevant settings for your project.
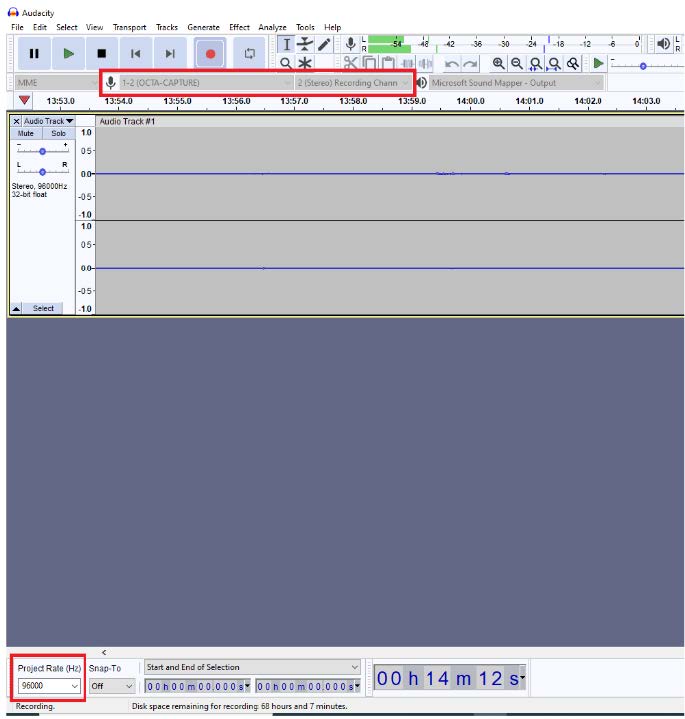
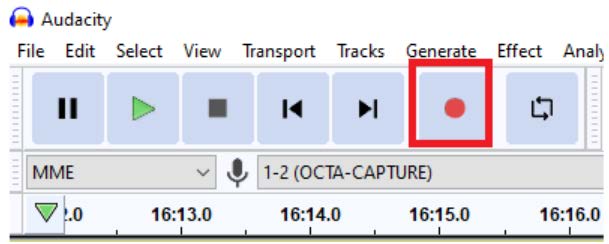
- On the main Audacity screen, verify that you see “OCTA-CAPTURE” next to the microphone icon (boxed in red below) and “2 (Stereo) Recording Channel” next to that to make sure Audacity is connected to the Roland sound interface. If you don’t see it, verify that both the cassette player and Roland are on and exit out of and restart Audacity. You can also verify the sampling frequency in the lower left corner (boxed in red below).
Capture and Save Your Audio
- If you need to determine a rough approximation of how much audio that a tape can hold, find the tape model listed on the casing. It is usually formatted as C46, C60, C90, or C120. Dividing the model number in half tells you how much audio capacity is on each side. A C60 tape can contain 30 minutes of audio on each side. It’s recommended that you minimize pausing while the tape is playing and simply play the tape through when digitizing to minimize the need for any audio editing.
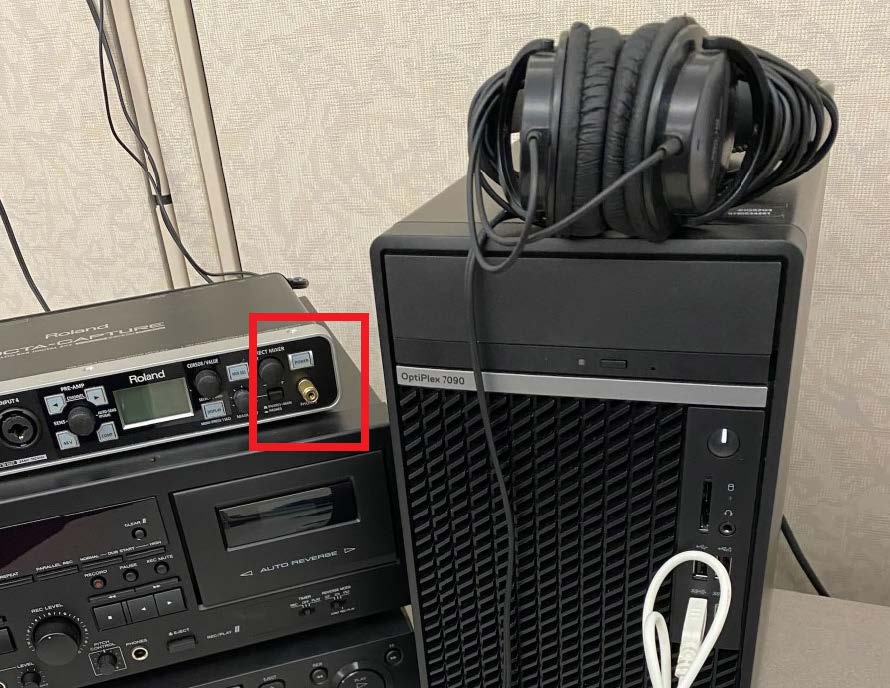
- To listen to the audio while it’s playing, plug the headphones in to the Roland sound interface (seen boxed in red below).
- Click the red Record button at the top of the screen.
- Press Play on the tape deck.
- In Audacity, you should see green bars moving across the numbers at the top, depicted below, as your tape is playing. This means audio is being “heard” by Audacity.

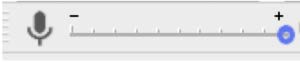
- To adjust recording volume as needed, move the slider next to the microphone icon in the upper right corner of the screen toward the minus sign (softer) or the plus sign (louder), as shown below. If the volume is already at the maximum and is still too soft, this can be managed once digitization is complete by following the Audacity Increase Volume Tutorial.
- You should see activity in the window like that in the screenshot below. The size of the upper and lower peaks may be smaller or larger depending on the original item.

- Save your file to your source media by going to the Audacity toolbar, clicking File, selecting Export from the menu, and then Export as WAV.
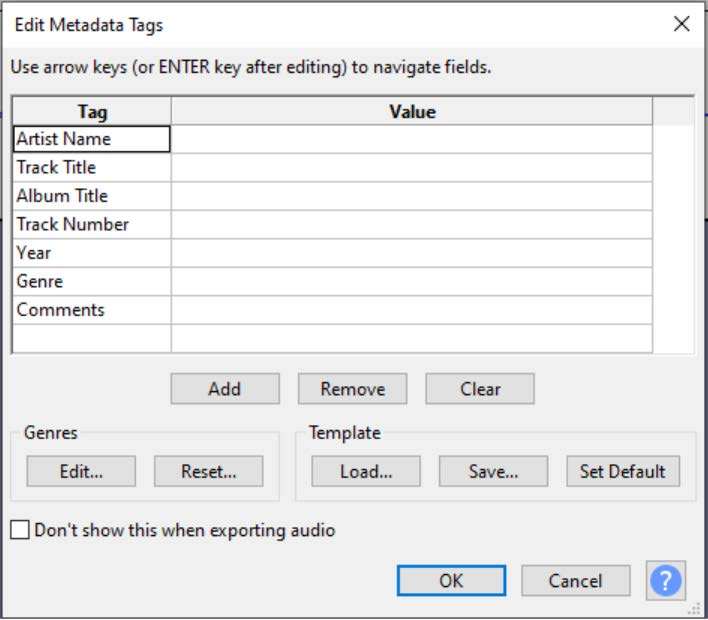
- When you save the file, a window will appear for you to enter metadata (description info) about the file. If desired, include how the file was digitized and who owns the rights to the recording. This information will be embedded into the file and can be viewed by viewing the file’s properties in the future. Name the file something that indicates information about the cassette, such as the creator, title, or date cassette was recorded or published.
- If you are uploading to a cloud location, such as OneDrive, save to the desktop and then upload to the cloud location of your choice. Once you have verified the file is uploaded, be sure to delete the file from the desktop.
- If there is content on Side B/Side 2 of the tape, Eject the tape, flip it to where Side B/Side 2 is facing you, insert it into the cassette deck, and repeat the capture and saving process. Sometimes there is no content on Side B/Side 2. To determine if there is content, play the first few minutes of the tape to listen for audio, fast forwarding to different parts of the tape and momentarily listening for audio if necessary.
- Once all portions of the tape have been captured, rewind the tape on Side A/Side 1 (instructions can be found in step 4 under Physical setup above) and Eject the tape. Remove the red and white cables from the front of the Roland sound interface (being sure to leave the adapters plugged into the interface) and clip them on the wall where they were originally placed.