VHS Player
On this page
Hardware: Sony SLV-N99, Elgato Video Capture Device
Software: Elgato Video Capture
Identification and Introduction
VHS tapes have been in use from 1976 to the early 2000s. VHS is a magnetic tape-based analog video cassette format, and the tape is composed of magnetic particles, a binder, and a polyester base. Tapes are susceptible to damage from mold, binder deterioration, and other physical and biological issues. The quality of the original tape, the type and condition of the machine on which it is played, the amount of care the tapes are given, how often they are played, and the age of the tape may reduce the quality of the final digitized tape. VCRs to play VHS tapes are still available, largely due to the format’s long period of ubiquity prior to the introduction of consumer digital video. To learn more about VHS tapes, see the University of Illinois at Urbana-Champaign’s documentation on the format.
To determine the appropriate procedure, identify whether you have a VHS, VHS-C, or S-VHS.
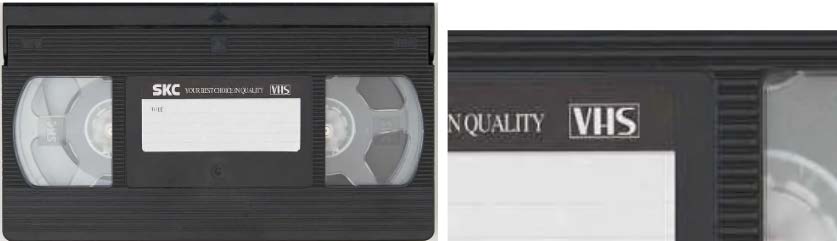
A VHS tape is 7 3/8” wide x 4 1/16” tall x 1” deep. It has a VHS logo (see example and zoomed in image of logo).
An S-VHS tape is the same size as a regular VHS tape but will have the following logo on the tape

An S-VHS cannot be played in our VHS player and requires a special S-VHS player. Reach out to digitizationlab@mail.wvu.edu to let us know that you have this format and are interested in the Digitization Lab supporting it in the future.
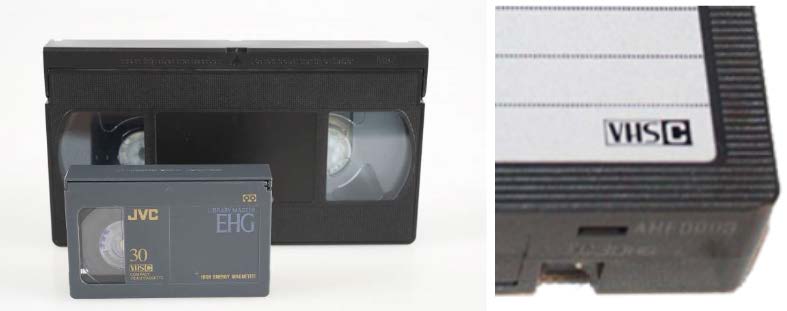
A VHS-C tape is smaller than a VHS tape at 3.625” wide x 2.25”tall x 0.8” deep. It requires an adapter (provided by the lab) to play in a VHS player. It can be identified by its size and the VHS-C logo on the tape. Regular VHS-C tapes can be digitized in the Lab. You may also encounter S-VHS-C, identified via an S-VHS-C logo, which requires an S-VHS player and cannot be played in the Lab. Reach out to digitizationlab@mail.wvu.edu to let us know that you have this format and are interested in the Digitization Lab supporting it in the future.
Digitization Procedures
Inspect Item for Issues
Because of the age and fragility of the format, it is important to inspect the item for preservation issues before digitizing the item. Follow the checklist below to determine whether there are any issues with the tape that might impact digitization.
- Examine the tape for physical damage.
- Verify that the case is not cracked. If the case is cracked, the VHS tape cannot be digitized in its current state.
- If the tape that is typically inside the VHS is on the outside of the VHS and the tape is not significantly damaged, consider rewinding the tape manually and monitoring these tapes closely while conducting digitization. There may be loss to content if the tape is damaged or malformed and cannot be read properly by the VHS player. Reach out to digitizationlab@mail.wvu.edu once digitization is complete or any issues are encountered so that the tape heads may be cleaned.
- If the tape is broken, the Digitization Lab does not have supplies available to splice broken video tape in a way that follows the preservation principles of reversibility and not doing harm to materials in the long-term. Certain methods of splicing tape, such as using standard office tape, are not recommended. These splices can create adhesive residue in the tape player itself causing mechanical damage to the player. Additionally, these splices can damage the tape itself. Please reach out to digitizationlab@mail.wvu.edu so that the Lab can source materials and create procedures for this work in the future.
- Move the tape back and forth and closely examine the reel through the window to look for particles such as dust and dirt. If you see any contaminants, be sure to monitor these tapes closely while conducting digitization and reach out to digitizationlab@mail.wvu.edu once digitization is complete or any issues are encountered so that the tape heads may be cleaned.
- Examine the tape for biological contamination.
- Look for mold. Examine the inside of the tape case where possible and the edges of the tape reel. Mold can be black, brown, or mustard-colored, and has fuzziness and hair-like growths. If you encounter mold, do not attempt to play the tape. Do not digitize these materials as moldy tapes, when played, can contaminate all other subsequent tapes played. Place the effected media in a plastic bag to quarantine it and reach out to digitizationlab@mail.wvu.edu to determine next steps.
- Look for droppings, urine stains, tracks, and gnawing damage that may result from pests. If you encounter evidence of pests, place the effected media in a plastic bag to quarantine it and reach out to digitizationlab@mail.wvu.edu to determine next steps.
- Examine the tape for chemical degradation.
- Sticky shed syndrome
- VHS tapes are made of a binder layer containing magnetic particles that contain the audio and video information on top of a base layer of polyester. The binder layer may be affected by “sticky shed syndrome” where the binder layer flakes off the base layer. Sticky shed syndrome can be identified by:
- the presence of a pungent waxy or “dirty-socks”-type odor immediately detected when a tight storage container is opened (avoid direct smelling but instead fan air towards nose)
- stickiness when the tape is unwound
- squeals when the tape is played
- binder and magnetic particles readily flaking off the tape base resulting in sections of missing binder material
- VHS tapes are made of a binder layer containing magnetic particles that contain the audio and video information on top of a base layer of polyester. The binder layer may be affected by “sticky shed syndrome” where the binder layer flakes off the base layer. Sticky shed syndrome can be identified by:
- The oxide flakes may be present inside the container or visible through the clear VHS cassette window. Often, there is no oxide loss until the tape is played and, as it plays, the oxide/binder debris accumulates on the posts and heads of the VCR. This buildup causes picture noise, friction and squealing that become progressively worse when playing the tape. Depending on the degree of degradation, the tape will also stick repeatedly to the equipment parts making play extremely difficult.
- If obvious signs of binder degradation are present (such as flaky debris and squealing while playing the tape), the tape should not be played or should be immediately stopped, and you should reach out to digitizationlab@mail.wvu.edu to determine next steps.
- Sticky shed syndrome
Physical Setup
- If you determined that you have a VHS-C tape in the Identification and Introduction section, insert the tape into the adapter found on top of the VHS player. Instructions for using the adapter are on the adapter.
- Verify that the VHS Player is plugged in to the surge protector below the desk. The cord is labeled as VHS Player. Turn on the VHS player by pressing the power button on the upper left portion of the device.
- Determine if you need to rewind the tape. If you are looking at the clear windows on the top of the tape, all black tape should be on the left spool. If some is on the right, press and hold Rewind. Depending on where the tape was stopped, this may take a moment. Rewinding will stop automatically.

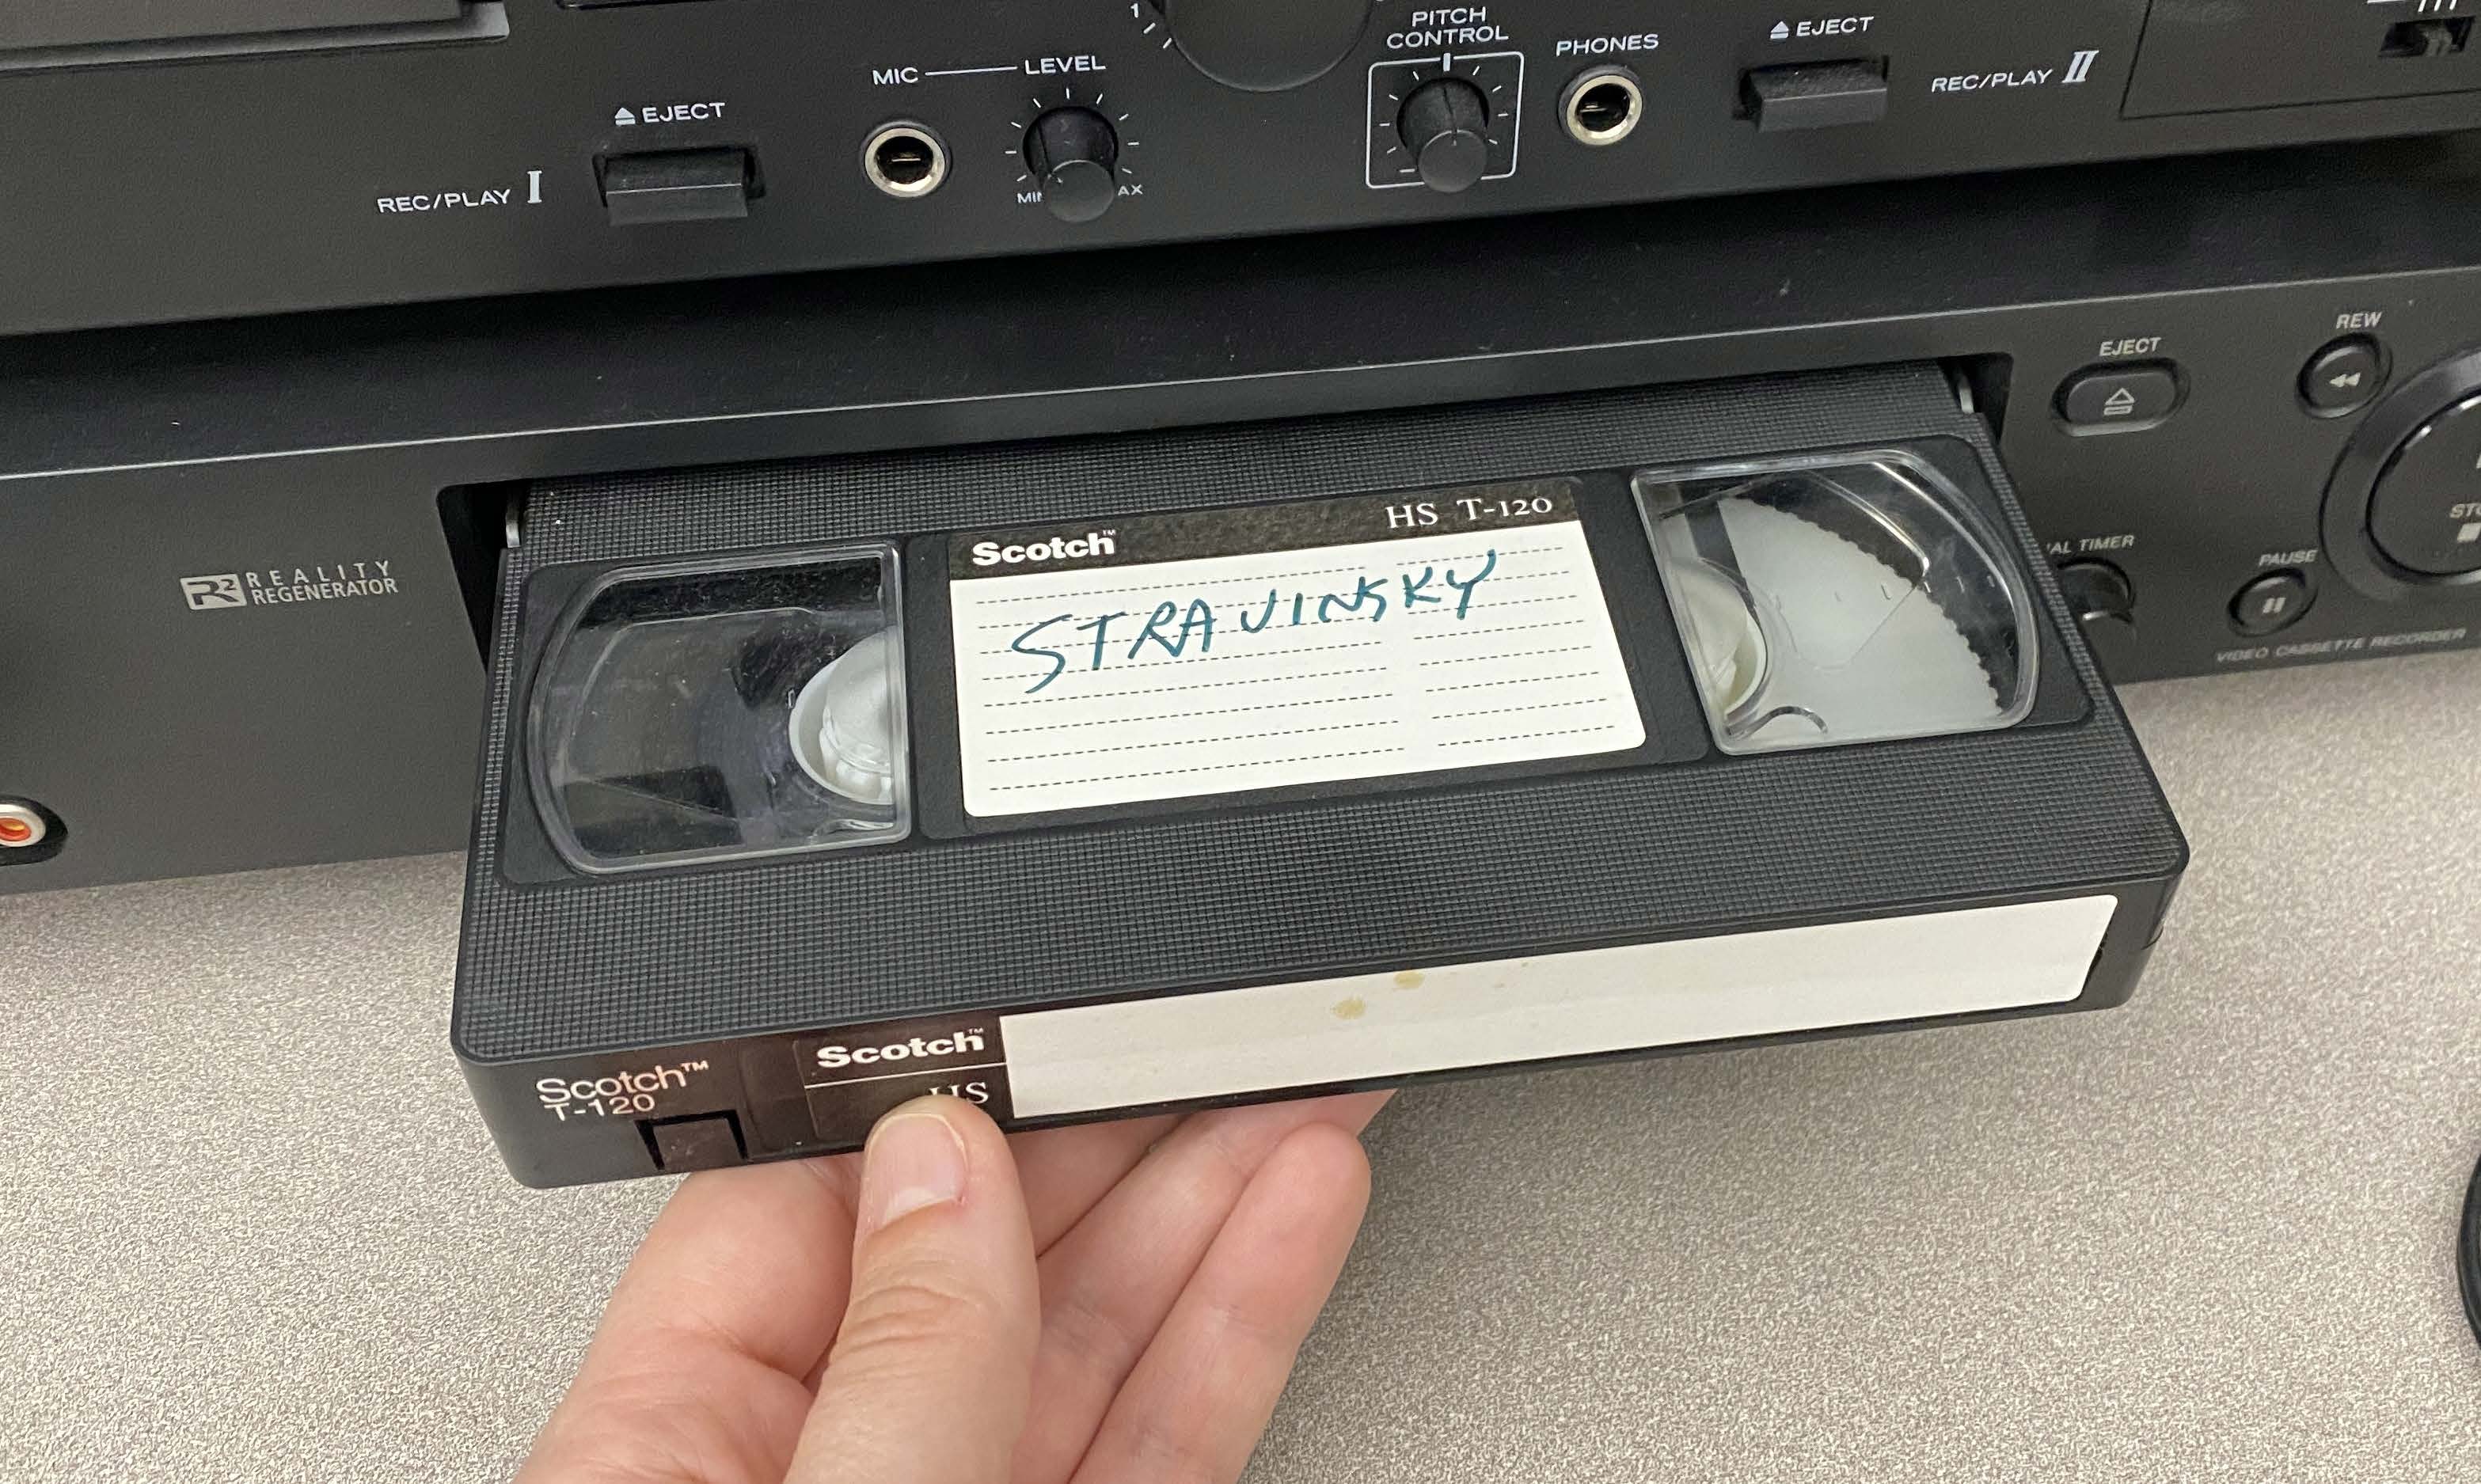
- Insert the tape into the player. The correct orientation can be seen in the image below:
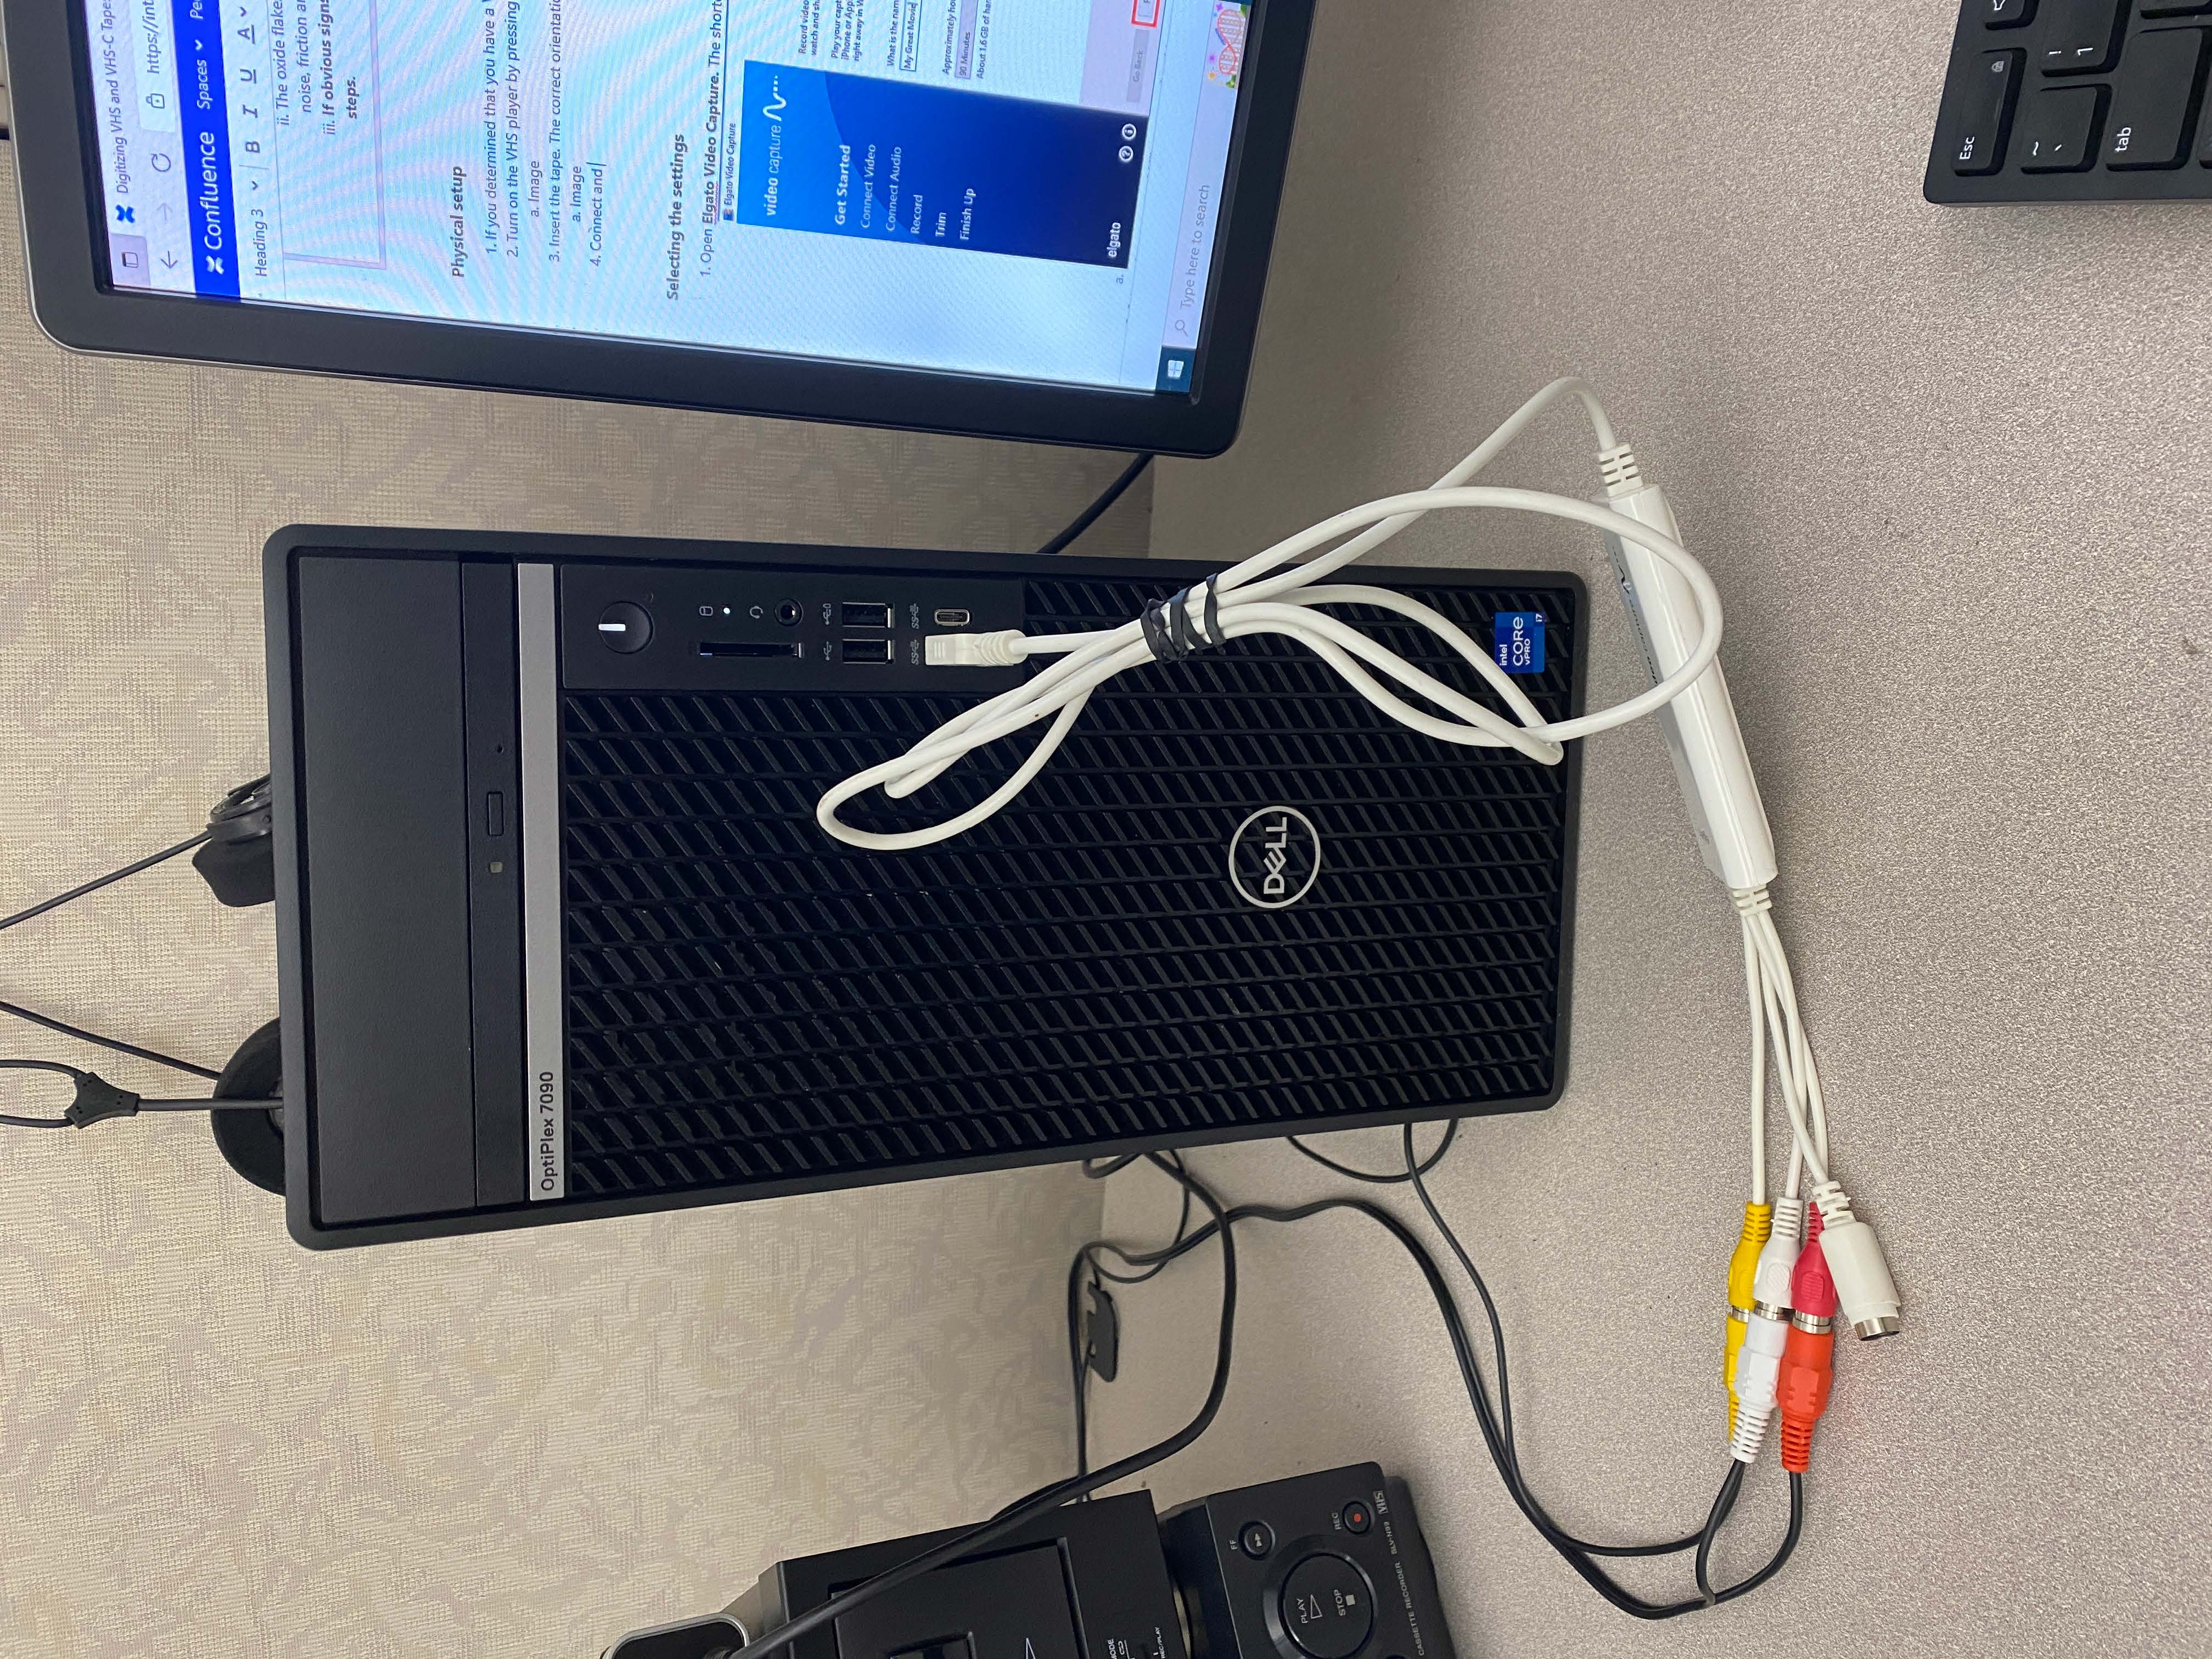
- Connect the yellow, white, and red cables on the Elgato capture device to the complementary yellow, white, and red VHS cables (as seen below). These cables are hanging on the cubicle wall and will be labeled with VHS Player. Plug in the USB on the Elgato to the computer if it is not already plugged in.
- Connect the yellow, white, and red cables on the Elgato capture device to the complementary yellow, white, and red VHS cables (as seen below). These cables are hanging on the cubicle wall and will be labeled with VHS Player. Plug in the USB on the Elgato to the computer if it is not already plugged in.
Selecting the Settings
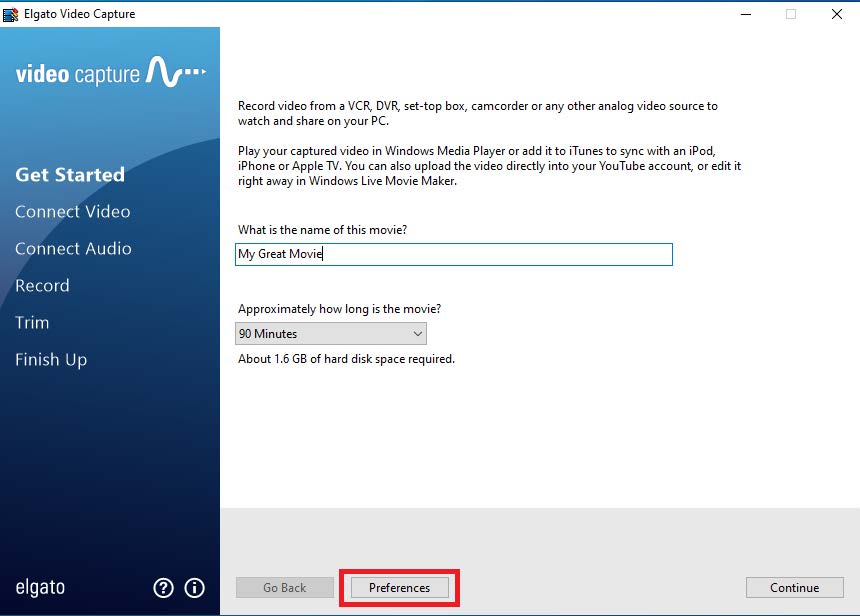
- Open Elgato Video Capture. The shortcut is on the desktop. Choose your filename in the “What is the name of this movie?” box. Once the program is open, select Preferences (boxed in red below).
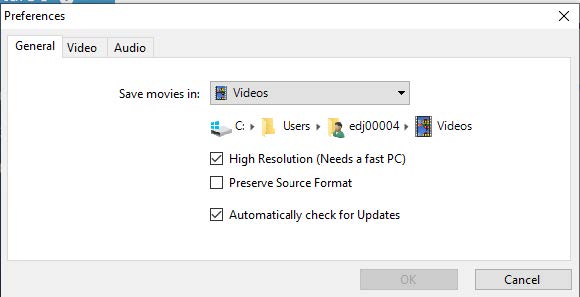
- Select where you would like to save the video.
- The VHS digitization setup in the Lab can only capture at one quality. This quality is roughly equivalent to, but slightly better than, the access quality standard for VHS and VHS-C tapes outlined in the Digitization Standards Document. The exact settings for an item digitized at this quality, taken from an item digitized in the Lab, can be seen below.
| File Type | .MPEG-4 (.MP4) |
| Video Codec | H.264/AVC |
| Frame Size | 640x480 |
| Frame Rate | 29.97fps |
| Color Space | YUV420p |
| Chroma Subsampling | 4:2:0 |
| Audio Rate | 48kHz, 221kbs, 2 channels |
Capture and Save Your Video
Note: Digitize the video without stopping to minimize editing or skipped video. VHS tapes can be, but rarely are, up to 2.5 hours long, so be sure to account for this.
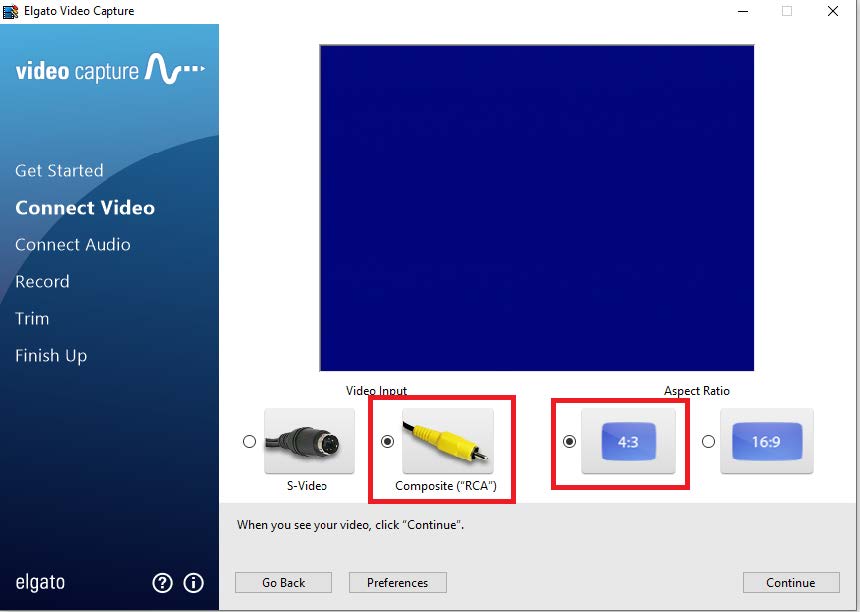
- After selecting your preferences in the Selecting the Settings section, click Continue. You will see the following screen. Confirm that Composite and 4:3 (boxed in red) are selected.
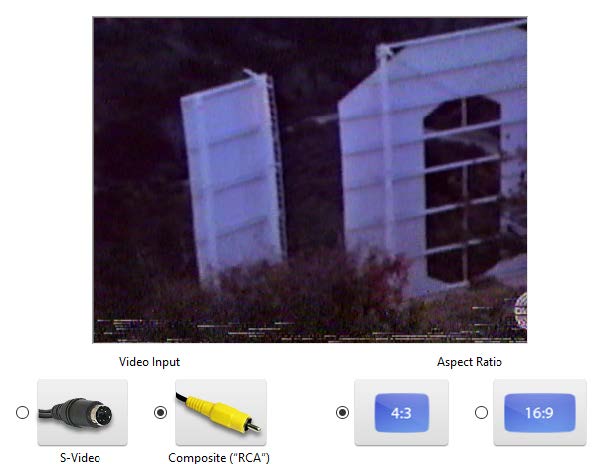
- Press Play on the VHS. You should see video on the screen as in the example below. Note: you are not capturing video at this point and anything viewed on the screen will not be saved.
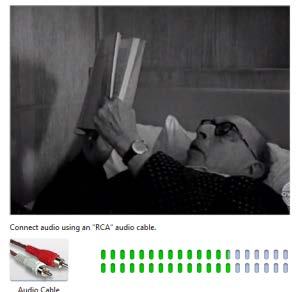
- Press Continue to go to the next screen. Plug the headphones on top of the tower into the computer tower and listen to verify audio can be heard. You can tell audio is coming through by seeing green on the bars next to the Audio Cable image. Note: you are not capturing video at this point and anything viewed on the screen will not be saved.
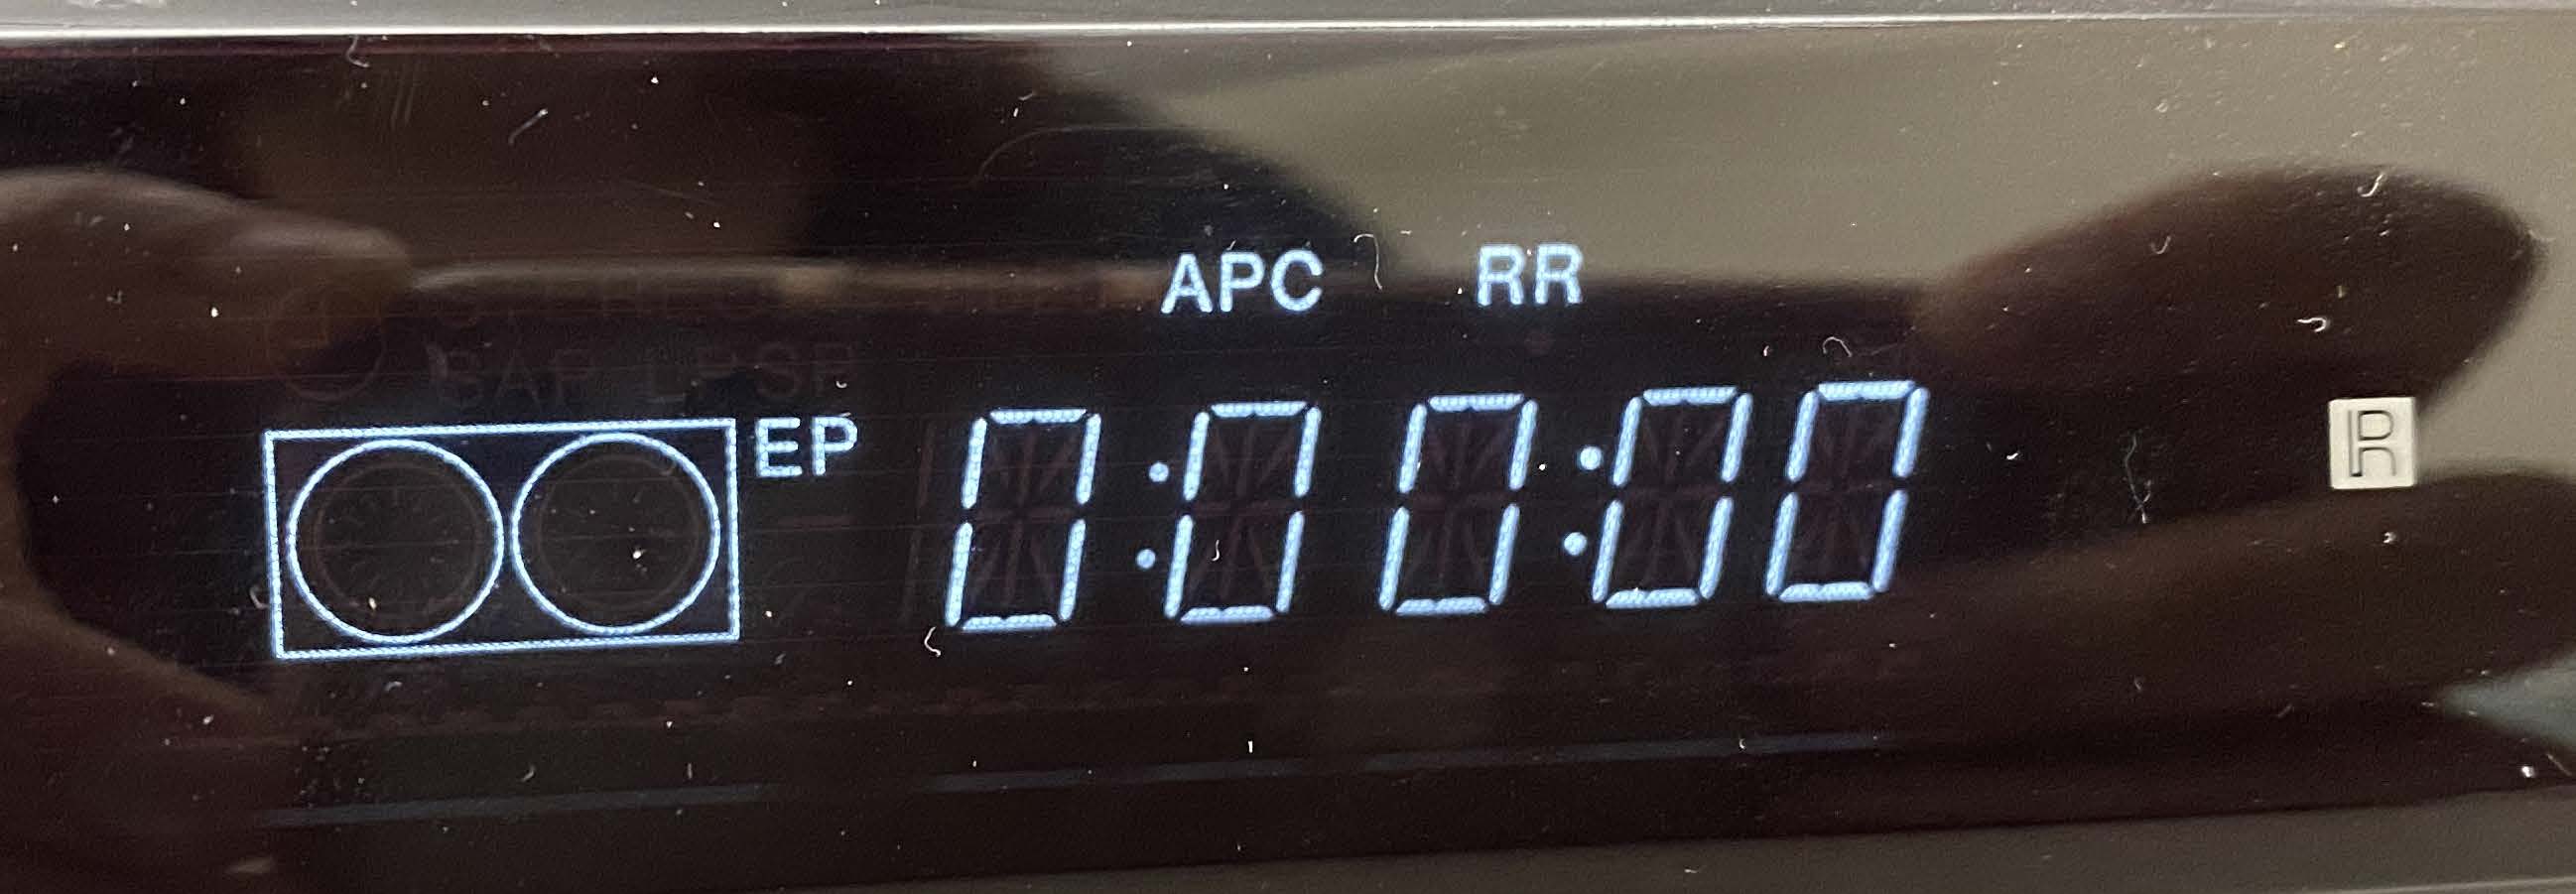
- Press Continue and go to the next screen. This is the screen where you will record the video. Press and hold the Rewind button until the tape unit reads 0:00:00 or will not rewind anymore. Press Start Recording in the Elgato Video Capture program and then press Play on the VCR.

- Monitor the video and audio of the recording the entire time. Once you start, you cannot easily pause and restart without missing portions of the audio and video. Once you are done recording, press Stop Recording.

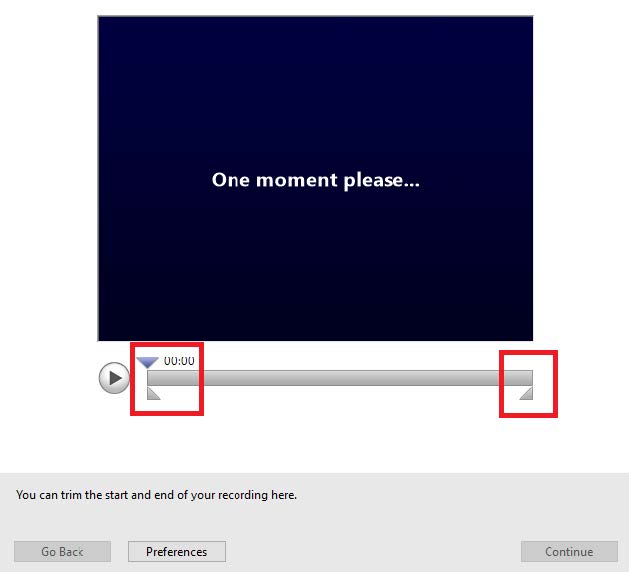
- Click and drag the sliders at the beginning and end of the video (boxed in red below) to trim off any excess video you would like to remove. Once finished, press Continue.
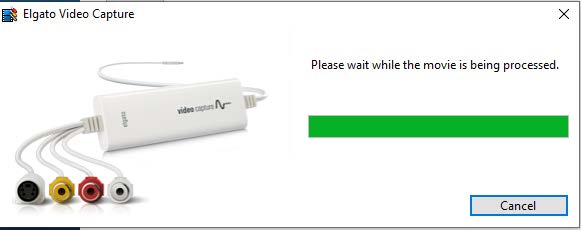
- Wait while the video processes.
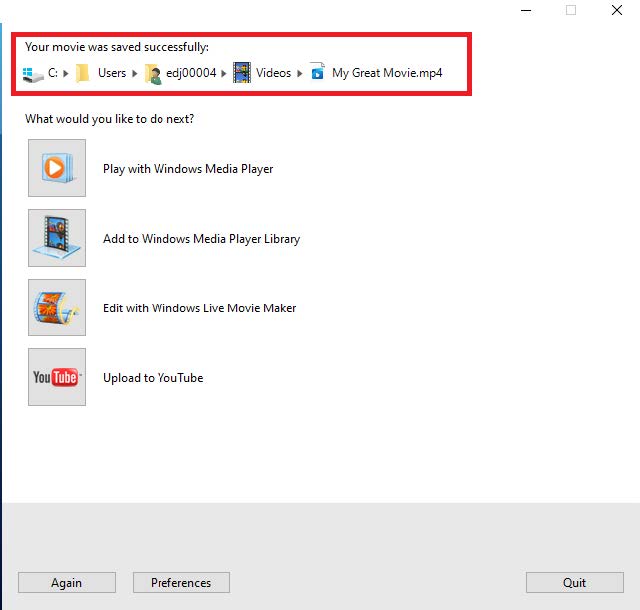
- You are now finished. You can see the location where your video was saved on the top of the screen (boxed in red below). Press quit when you are finished.
- If you are uploading to a cloud location, such as OneDrive, upload to the cloud location of your choice. Once you have verified the file is uploaded, be sure to delete the file from the location where you saved it.
- Once all portions of the tape have been captured, rewind the tape (instructions can be found in step 3 under Physical setup above) and Eject the tape and turn off the VCR.
- Remove the red, yellow, and white cables from the Elgato Capture Device and clip them on the wall where they were originally found.