Overhead Scanner
On this page
Hardware: Bookeye 4
Software: Opus FreeFlow
Digitizing Books and Oversized Flat Items
Arranging Your Object On The Scan Bed
Center your book on scan bed. Align its text along the red laser line that appears when the scanner is powered on, being sure the item is straight and skewed as minimally as possible.
For books that will not remain open on their own, use the red fabric weights or your hands as necessary. The Bookeye will allow you to edit out your fingertips at a later step if desired.
Scan Settings
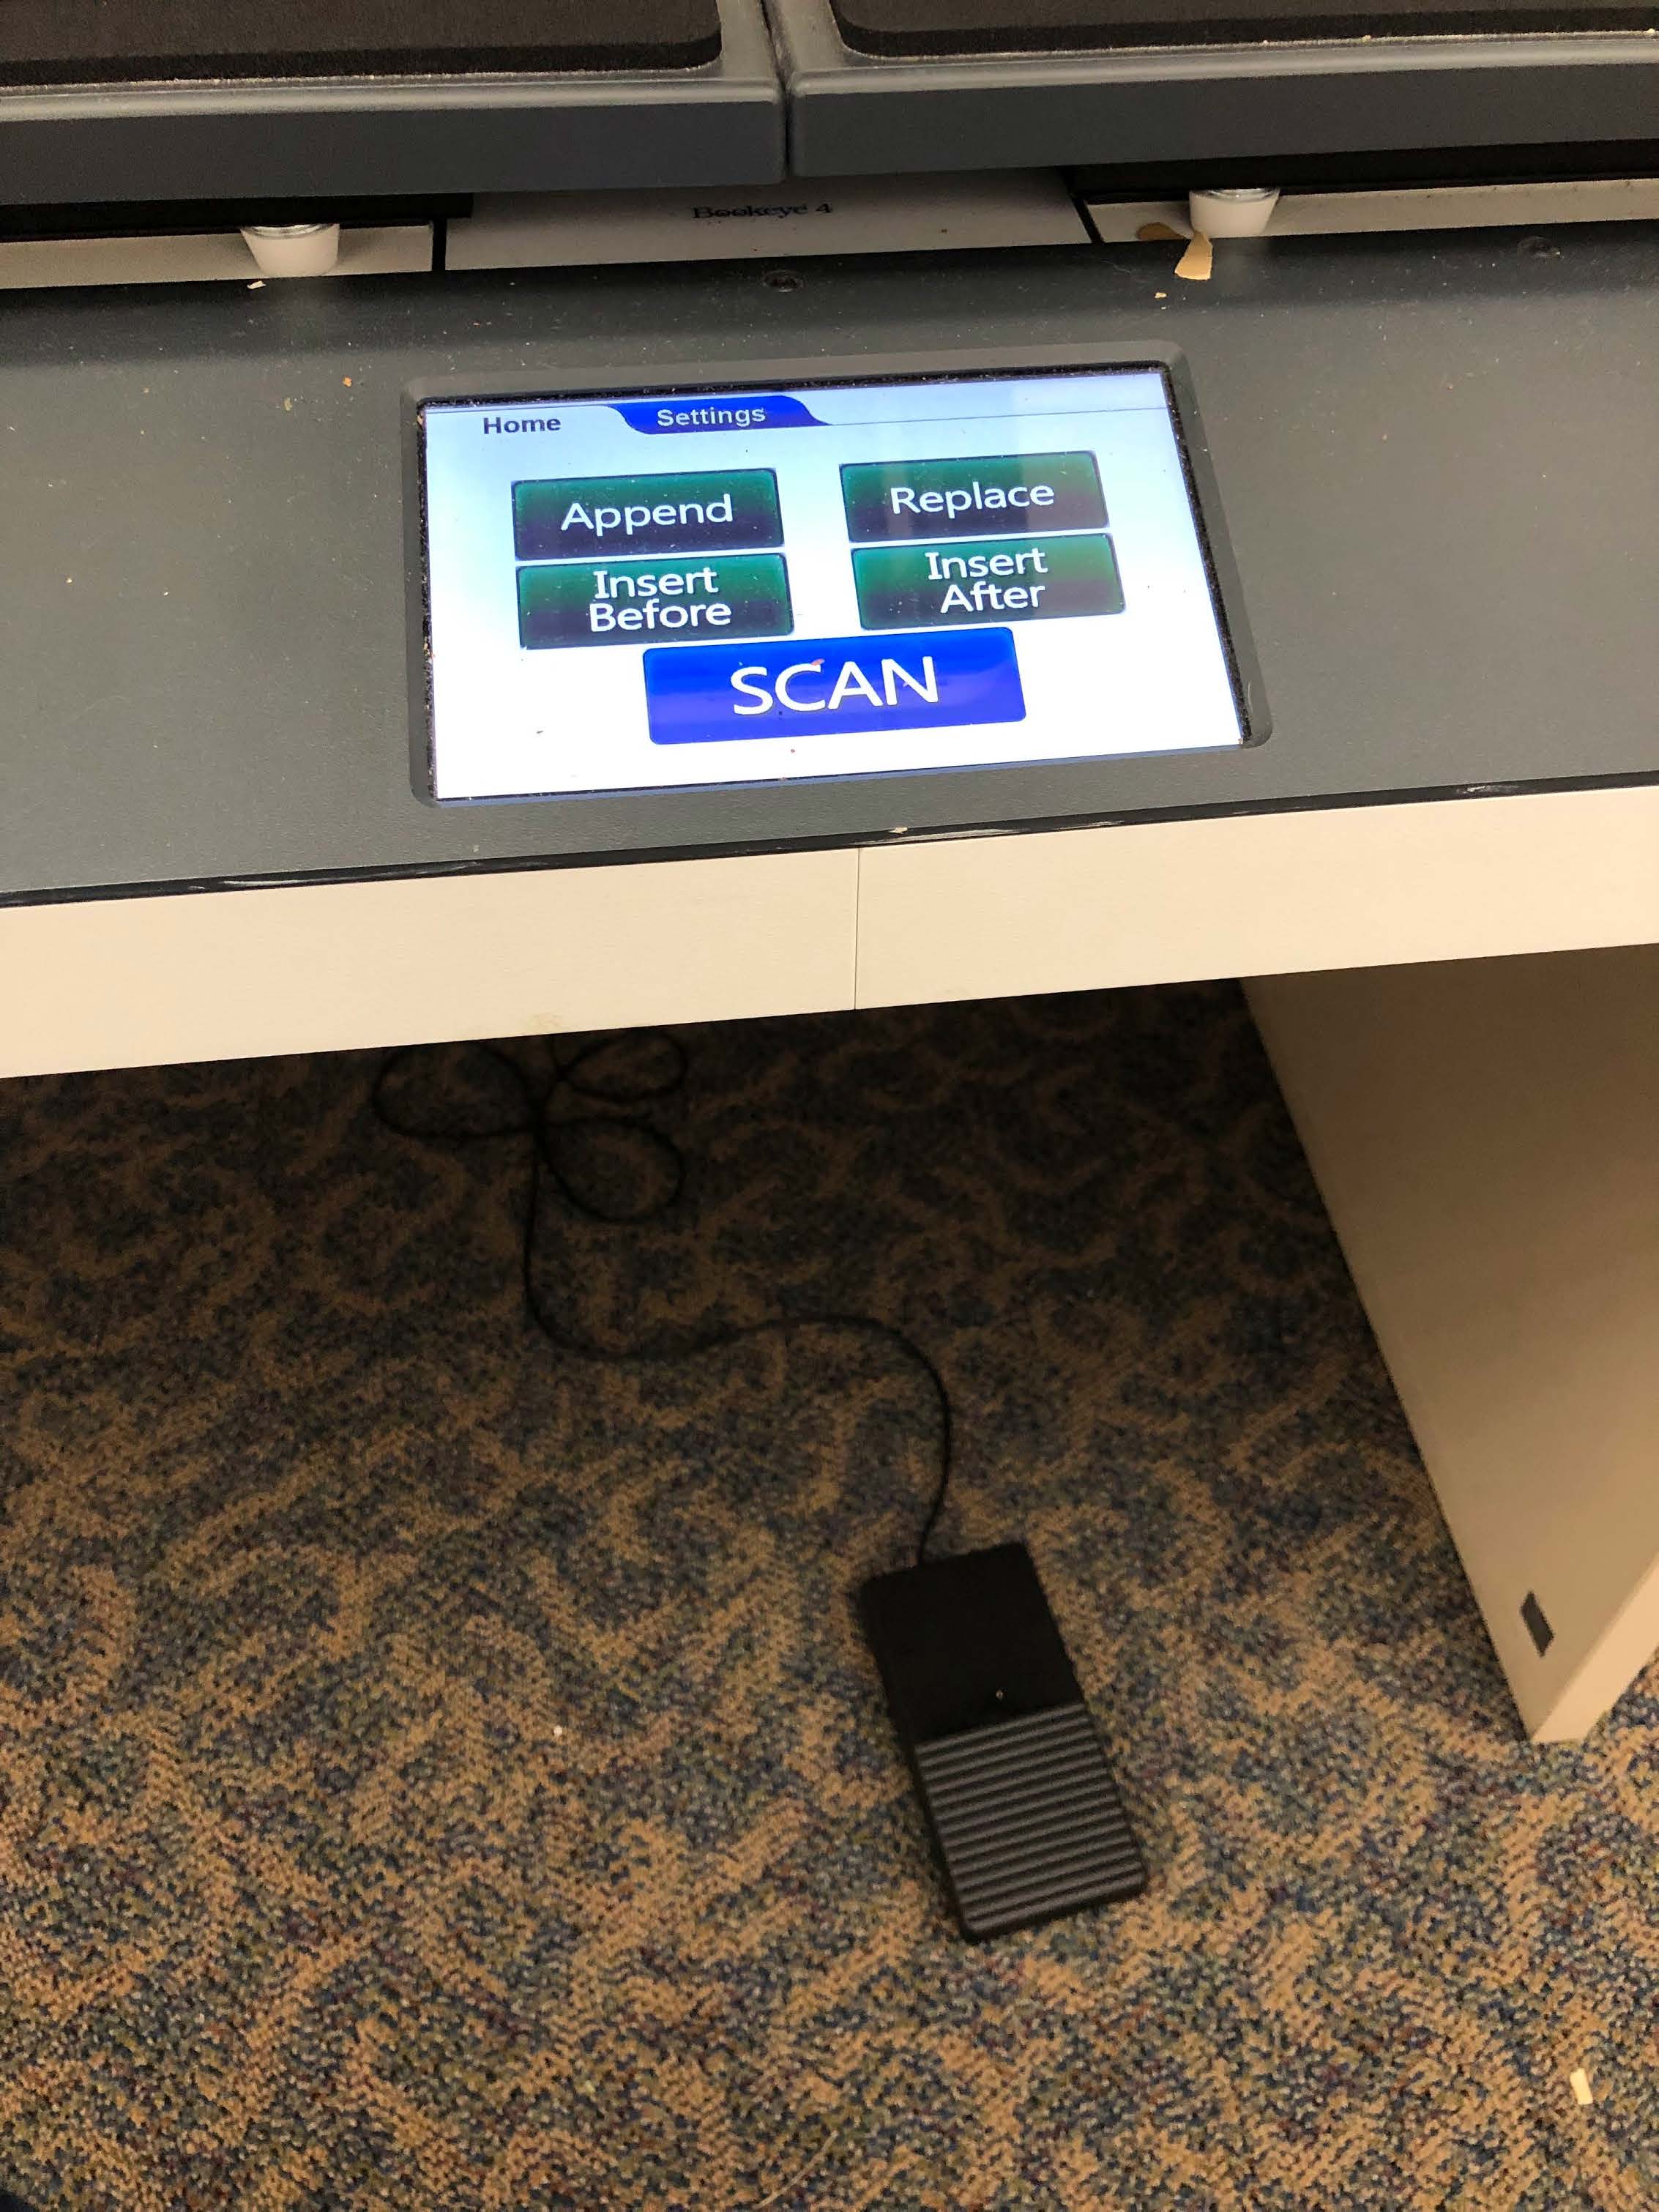
Press the POWER button on the Bookeye scanner. It is located on the right side of the machine’s front panel.
Once the scanner has warmed up, open the program on the computer desktop.
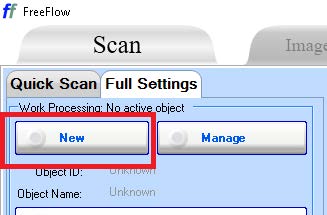
Begin by clicking “new object.” This will contain the entire scanning project.
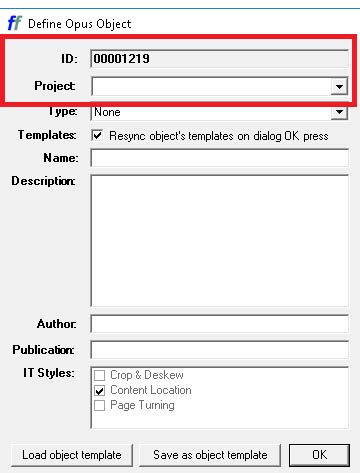
In the window that opens, name your project. Keep note of the ID number as it will indicate the project’s location in the Active Object Hive folder later on. Then click OK.
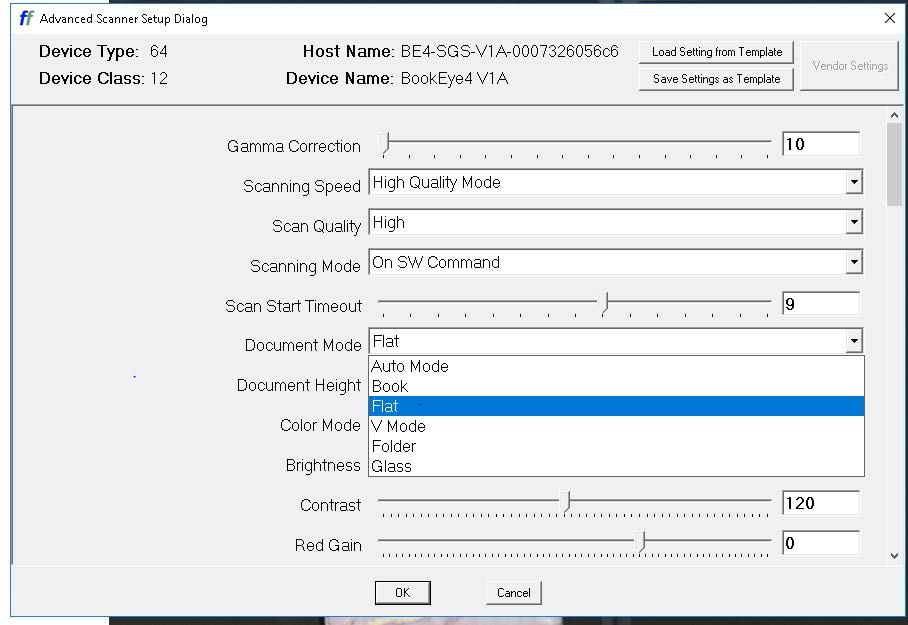
Go to the Full Settings tab. Click the Setup button to access the project’s scan settings.
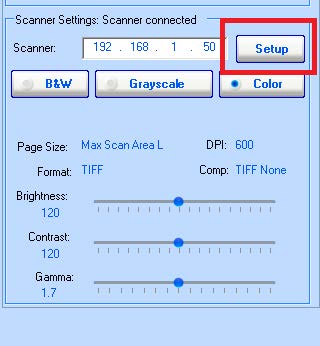
Most settings can be left as-is. The most important setting is setting Document Mode to Flat if the object is flat. If digitizing a book or other item that uses the cradle, set to Book or V-Mode.
Scanning
Once the settings are arranged, you may begin scanning. Tap the Scan button in the program, on the scanner front panel, or press the foot pedal on the ground to begin a scan.
Once the Bookeye has completed a scan, you may turn the page of your book (if scanning a book) and press the button again. Each scan will appear in the bottom tray of the program.
Once you have completed scanning all pages or items, you have two options. A: If you are satisfied with your scans and do not need further editing, you may proceed to retrieve the files from the Active Object hive. B: If you wish to use the program’s automatic thumb removal functions or have the program rename the image files for you, you will move to Image Treatment tabs and Exporting tabs.
Retrieval Option A: Retrieving Files from the Active Object Hive
In Opus Freeflow, close your object. Then close or minimize the program.
Select this icon on the desktop:
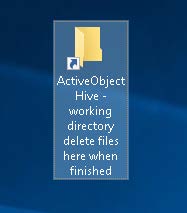
The content you created is nested several folders deep. You’ll need to go from ActiveObject Hive/01171/00/001/Your ID Number. Your ID number may be missing some 0s prior to the start and sometimes end of the folder name. Use the “date modified” information to confirm that those are your files.
Inside of that folder in the “Full Size Images” folder, you can copy and paste the files there into your hard drive or thumb drive. Your scanning project is now complete!
Be sure to take all needed scan files with you after every session. The Digitization Lab cannot guarantee the long-term storage of these files on the machine.
Retrieval Option B: Image Treatment and Exporting
Note: depending on the number of files and file size, this process can take quite some time to export. If you are on a tight time constraint, we recommend using Option A: Active Object Hive option above.
Opus Freeflow offers in-program image editing such as thumb removal, skew adjustments, and content clipping. Specifics on each are below, as taken from the official manual. A number is below each icon. Use that number to refer to the relevant functionality in the following section.
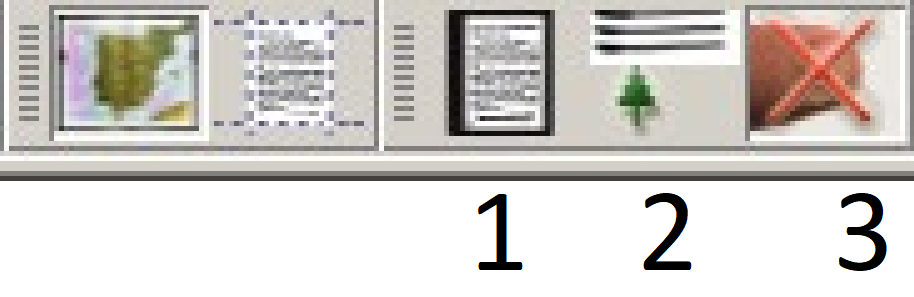
1. Content Location and Deskew Using the Content Location and Deskew function will help the user to include or exclude portions of the image(s) in the content to be preserved.
Click the Content Location and Deskew icon (labeled as 1 in the image at the beginning of this section) and pages will appear with two boxes on them, one for the left page and one for the right page.
It is important to note that by changing the clip size on one image, all the clips will be set to the same size throughout the object if they are set to be dependent.
To apply the changes, click Perform IT on Current Image or All the Images. The results are displayed in the Export tab for review. To delete a clip, right click anywhere inside the clip. To create a clip, click and drag on the image where the clip is going to be placed. If the image is dependent and the user needs to create a clip, click on the image where the upper-left corner of the clip should be placed and a clip of the predetermined size will be displayed.
2. Curvature Correction
Click the Curvature Correction icon (labelled as 2 in the image at the beginning of this section). A blue line with multiple Move Points will appear on the top and bottom of the page where Opus finds book curvature. Move the cursor between two move points until a double arrow appears. Hold down the left mouse button and drag the line to the top or bottom where the user sees the biggest curve on the book.
Position the curve along the text or content on the page. Move the cursor over the move points. When a four-arrow cursor appears, create an underline to the curve by dragging the points to the bottom of the line following the curve of the book. Right clicking on a move point will delete it, while right clicking on an empty area on the line will add a move point.
3. Finger Removal
Click the Finger Removal icon (labelled as 3 in the image at the beginning of this section). A yellow box with eight Move Points will be placed over fingers that have been found by Automatic Image Treatment. If one of these yellow boxes needs to be modified, Mouse over a Move Point until it becomes one of the two double arrows and resize it, leaving about 0.5 inches between the box and the content on the page. This enables the software to ‘fill in’ the newly removed area with surrounding background.
If the user needs to delete a yellow box, right click on it. To create a yellow box, click and drag anywhere inside the clip. To move the yellow box, hover the mouse over it and when the cursor turns into click and drag the box to position it in the correct place.
Exporting
Once you’ve completed your image treatment, navigate to the Export tab to save your files. Selecting “Export Images” will open a Derivative Settings window.
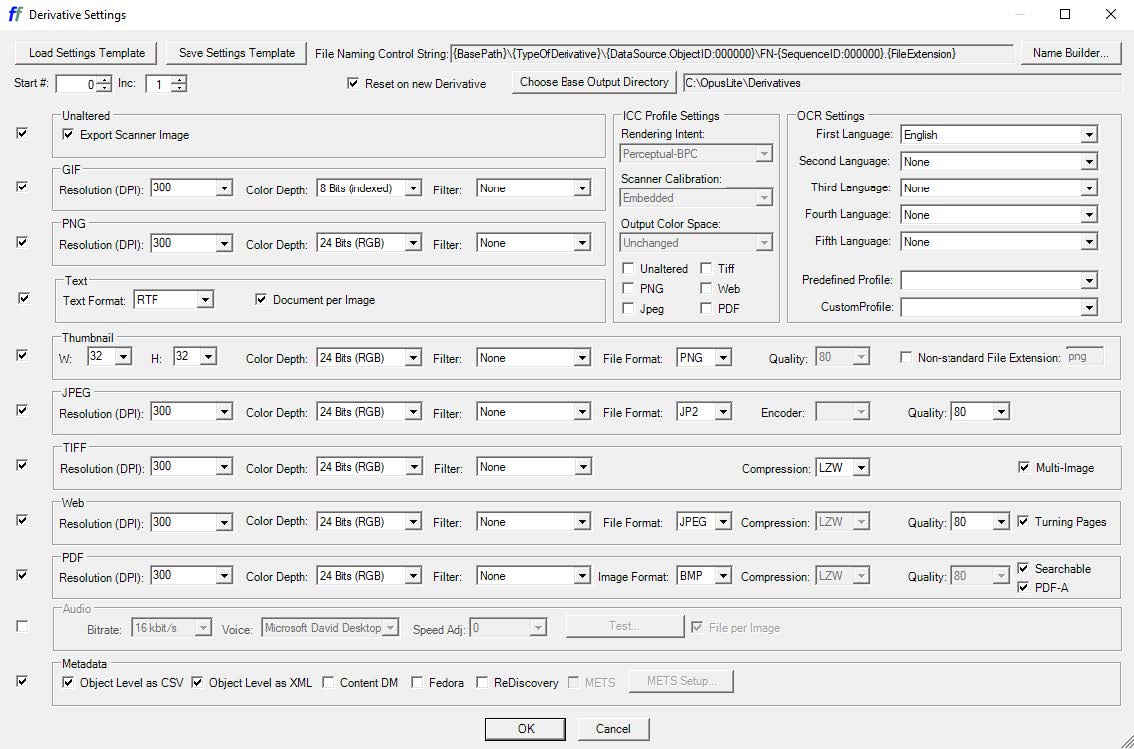
Select your preferred file format using the checkmark boxes on the far left (more than one can be selected if desired).
Selecting “Choose Base Output Directory” will allow you to choose the file destination. “Name Builder” in the top left will allow you to set up a naming scheme for the files.
Once satisfied, click “OK” at the bottom to begin the exporting process.
Note: The page not updating does not necessarily mean it is frozen. Transforming these images simply takes time.